

Wedding Makeup Timeline
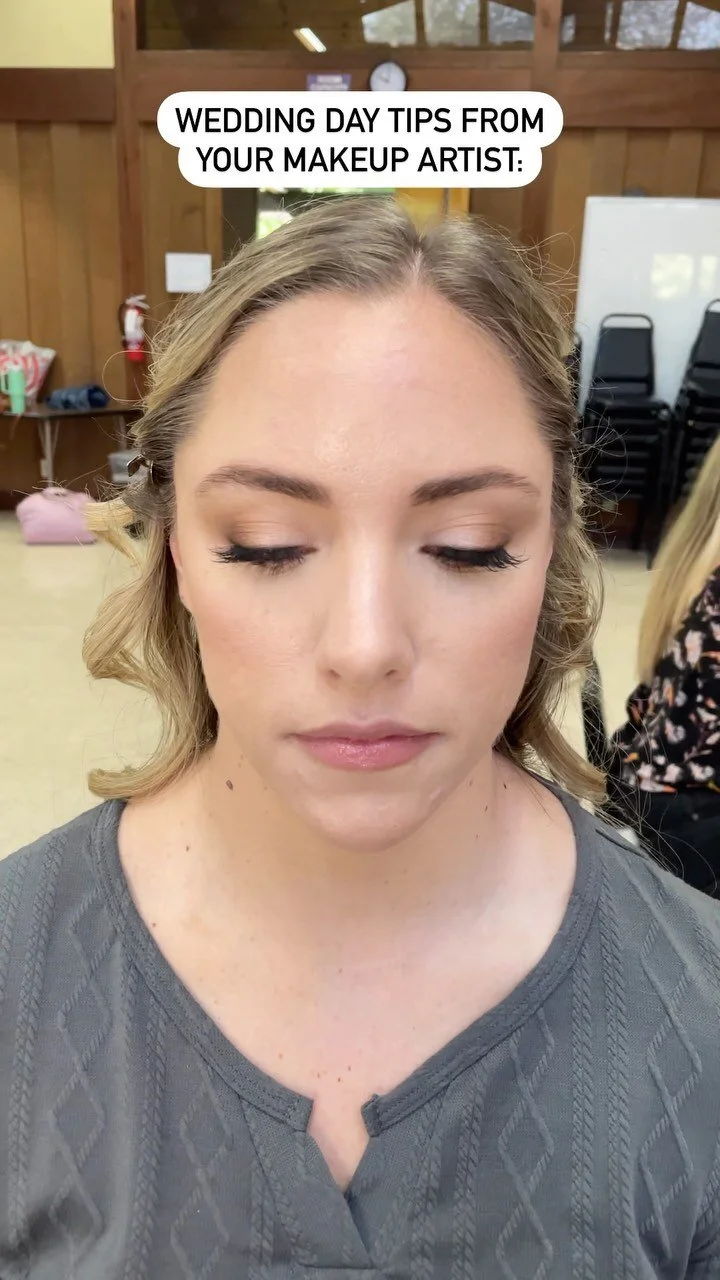
I get a lot of questions about what time we need to start makeup on your wedding day. While this process does not have to be complicated, there are a number of factors that go into determining the start time of your wedding day. (Spoiler, it’s usually earlier than you think.)
Everything you need to know and consider when planning your makeup start time.
I get a lot of questions about what time we need to start makeup on your wedding day. While this process does not have to be complicated, there are a number of factors that go into determining the start time of your wedding day. (Spoiler, it’s usually earlier than you think.)
I will start out by saying all of this information is what I prefer to do personally as an artist. If I am not your makeup artist the information will be similar and valuable, however, your artist may do things a little different. It is always best to go with how they like to schedule the morning.
I do a 2hr trial appointment with all of my brides about 4-6 weeks before the wedding and this is where we go over all of the details and map out the morning. Your start time will be finalized during this appointment. The week of your wedding I will send out a loose timeline outlining what times everyone will need to be ready for makeup.

Questions I ask that go into factoring the makeup start time.
How many people are getting makeup done?
Are you doing a first look?
What time does the ceremony start?
Are you wanting a lot of getting ready photos or photos with your bridesmaids?
Where are you getting ready?
How many people are getting makeup done? As a good rule of thumb, the more people who need to get ready, the earlier you will want to get started. It is not uncommon to have a 7:30 am or 8 start. (I’ve done earlier). I budget about 45 minutes for each bridal party member and one hour for the bride. I also like to add a 30 minute buffer time between when I finish everyone’s makeup and when everyone needs to be ready. This way we are not rushing.
Are you doing a first look? First looks are so wonderful and intimate. I personally love them. This does however mean that you will need to be ready sooner because this event usually takes place about 1-2 hours before the start of the ceremony. Again, this means you will need to plan for an early start to make sure everyone is ready for early photos.
What time does the ceremony start? Going the more traditional route and not seeing each other till you walk down the aisle? Great! You may be able to start a tad later; 9 am or 10 am. But this still will depend on the size of your bridal party.
Are you wanting a lot of photos with your bridal party before the Ceremony? How many photos do you want with them? Do you guys have cute robes or flannels you want photos of? You still will probably want to start early to make sure there is enough time to have cute group shots with your girls.
Where are you getting ready? Will you be at a hotel nearby? Or do you have to drive at least 15-30 minutes to get to your wedding venue? Let’s avoid getting a speeding ticket on your wedding day, and make sure drive time is accounted for. If you’re getting ready at the venue do they have a time of when you are allowed to enter? Certain venues in Chico won’t let you enter until 9 am, others let you enter as early as 7 am. Make sure you talk to your venue and see when they let you in the morning of your wedding.
All of these questions are things I go over with you during our trial appointment, so you don’t need to have all the answers beforehand. We will brainstorm what will works best for you and your bridal party. I personally tend to lean on the earlier the better side. This way we aren’t stressed for time, and you have plenty of time to hang out with your girls and relax all morning.
If you are getting married and looking for an artist you can fill out my Bridal form here.
If you are getting married and already have an artist I hope you find this post informative and helpful for your wedding day.
XO,
Annie
photo: @kalieciaannphotography
Everything you need to know about Lash Extensions
When someone is getting eyelash extensions for the first time there are usually a lot of questions on what type to get. Today I will break down the three types of eyelash extensions as well as ways to care for them. (I won’t be going over prices, everyone does pricing differently, but if interested mine can be found here.)
The first thing to keep in mind is it’s a commitment. I call them my high maintenance, low maintenance look. Day to day there really isn’t much I need to do (which is why I love them!) you do need to remember to wash them nightly but I just add it into my nightly skincare routine and it’s pretty easy. Washing your lashes helps keep them free of dust and particles that can build up on your lashes during the day. Your lashes are designed to keep things out of your eyes, so they can get a buildup on them that begins to weigh them down. Cleaning them helps prevent this.

Ok, now let’s get to the three main styles of lash extensions:
:
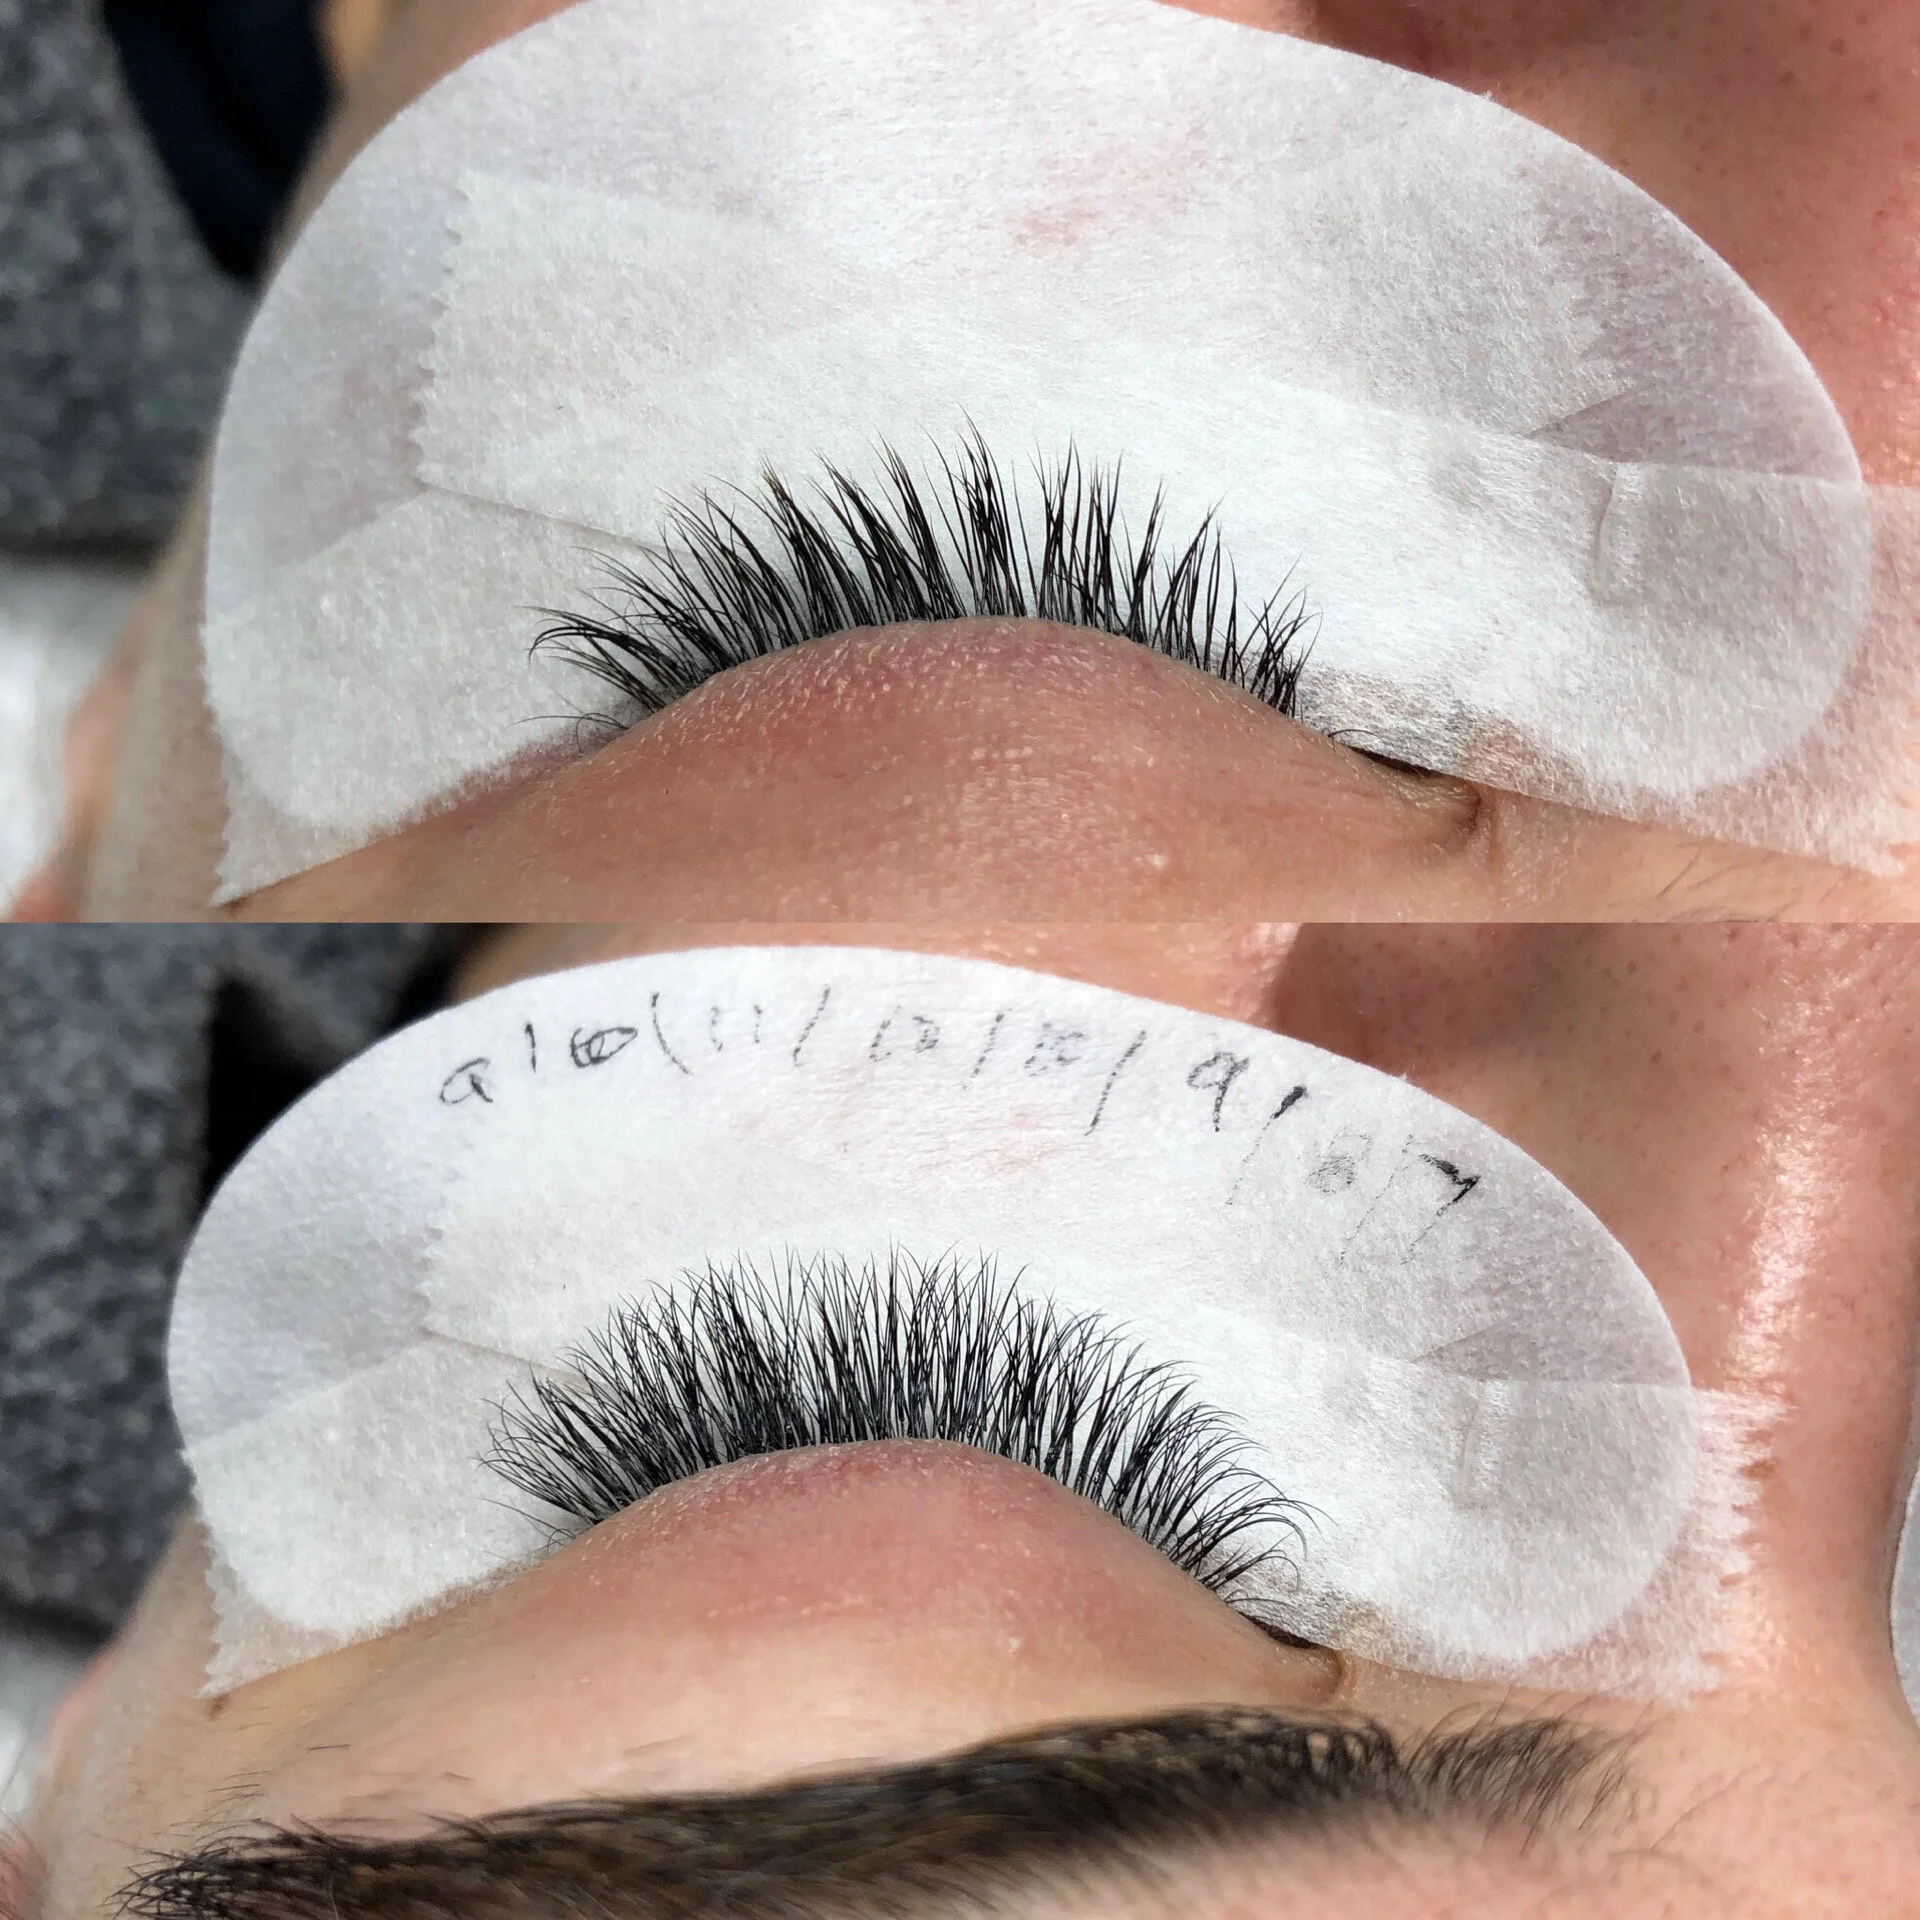
Classics: One extension is attached to one natural lash. This gives you the most natural form of lash extensions. Designed to give length to your natural lashes and the look of mascara. If you have never had extensions before and aren’t sure where to start this is always what I recommend first. It’s the most natural and you can always upgrade later.
Volume: Handmade fans of 2-5 lash extensions are placed on one natural lash. This style is for fullness over length. If you are someone who adds coats and coats of mascara onto your lashes trying to make them fuller, this might be more your style. It is the most glamorous and noticeable form of extensions. If you wear makeup or false lashes daily, you are going to want more of a volume look.

Hybrid: A 50/50 mix of both classic and volume lashes is used for this style. This is great for someone who likes a little more texture to their lashes. For some people, volume is too much, but classics are just not enough. Hybrid is the perfect mix of both. This is personally my favorite type of lashes. It’s a little more than the classics but still natural enough for me to wear no other makeup.
A few other things to keep in mind, full sets take anywhere from 2-31/2 hours. Your lash tech is getting every single lash, it takes a while cause unless you look really closely you may not know how many you have (usually much more than you think). You will also need to come in about every 2 weeks for fills. This keeps your lashes looking full all the time, but also helps your lash tech remove any outgrown lash extensions. As your lashes grow the extensions grow with the lash. If the lash grows too much the extension can weigh it down and cause your lashes to fall out too soon. This can cause damage to your natural lashes and we don’t want that. Good lash techs will always consider the health of your natural lashes when adding extensions. This includes removing outgrowth. Fills can take anywhere from 1-2 hours and time depends mostly on the style of extensions you choose. Because volume and hybrid require fans to be made, they take more time than classics.

A bonus alternative option:
Lash lift: Maybe lash extensions don’t sound like they would be a good fit for you. Lash lifts are an alternative option for someone wanting less morning maintenance, but maybe not the commitment of lash fills. A lash lift is essentially a perm for your lashes. It is a chemical process that helps reshape your natural lashes to give them more of a curl. After 24hrs. You can wear mascara and makeup like normal, your lashes will just have more of a curl and uniform shape. Depending on your hair type this service lasts 6-8 weeks. It’s a great 1st step for someone wanting a very natural and easy look.
I love eyelash extensions! They make my mornings so easy I rarely need to put makeup on now! I hope this helps give you an overview of things to consider. Again I love my lashes! But they are not for everyone. My hope is that this article helps you determine if they are for you, and also what style you think will suit you best. For my pricing and booking, you can head over to the service page on my website here.
Thanks for reading!
Xo,
Annie

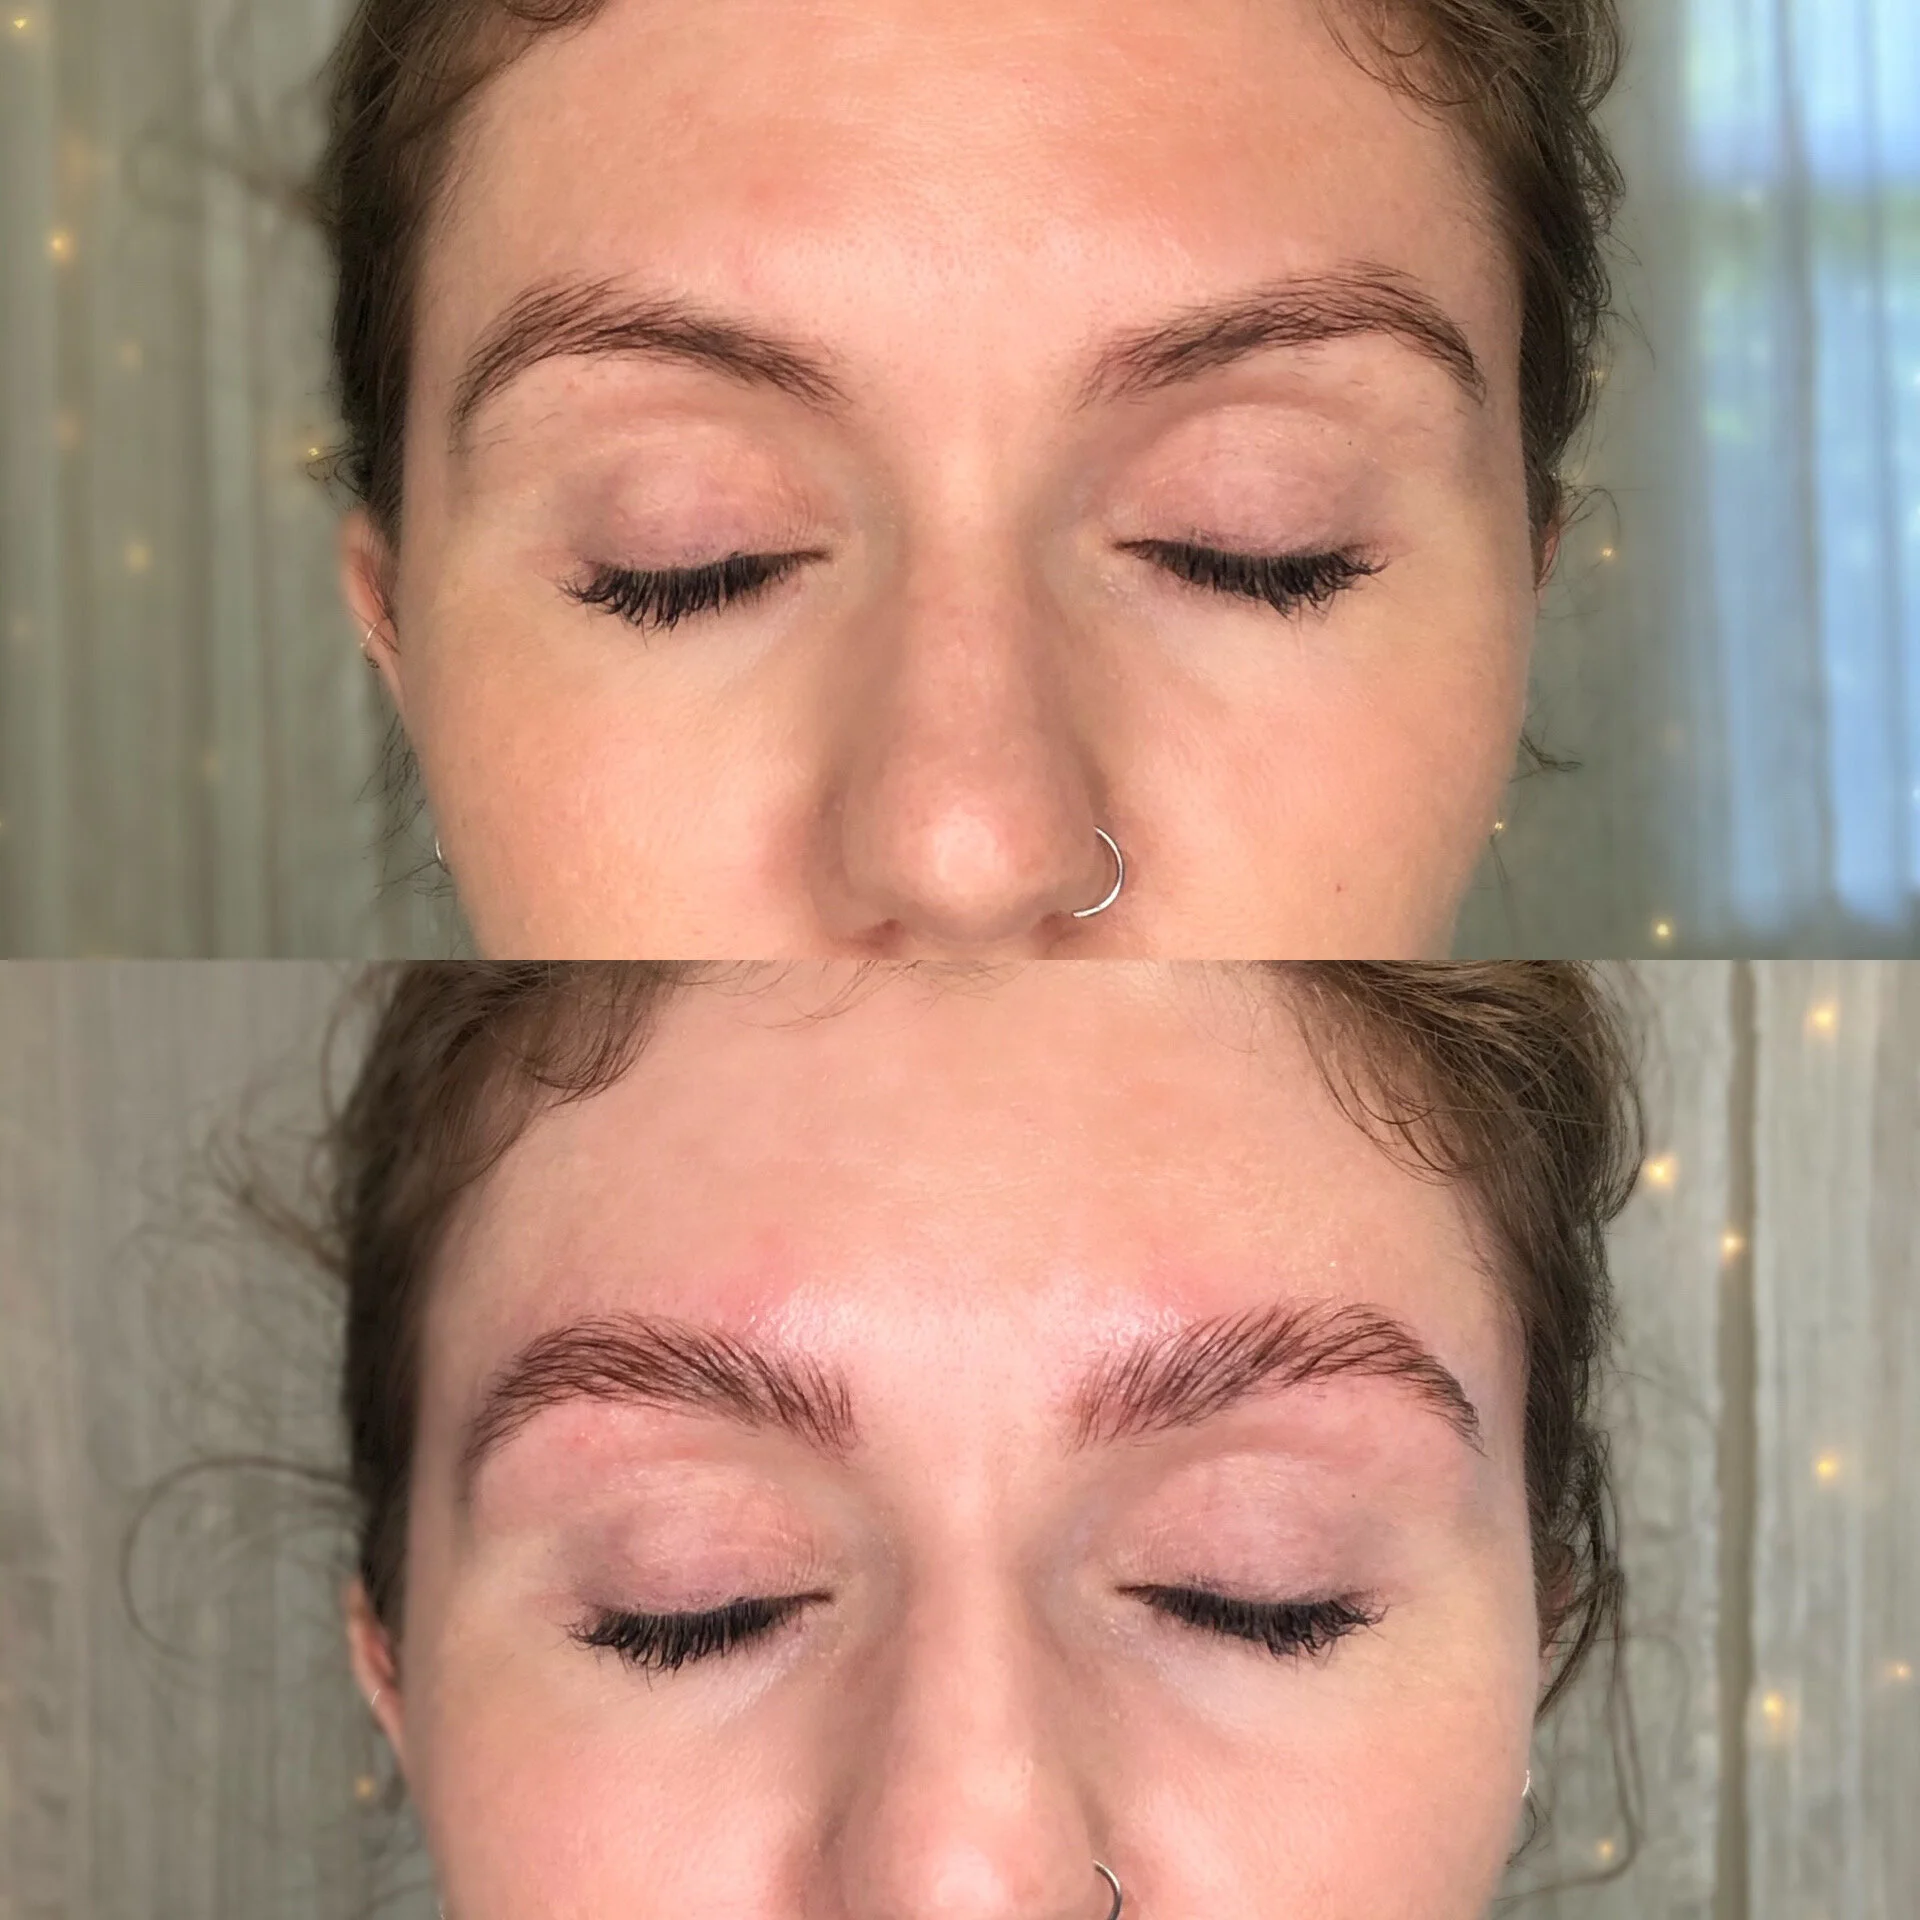
All you need to know about Henna Brows
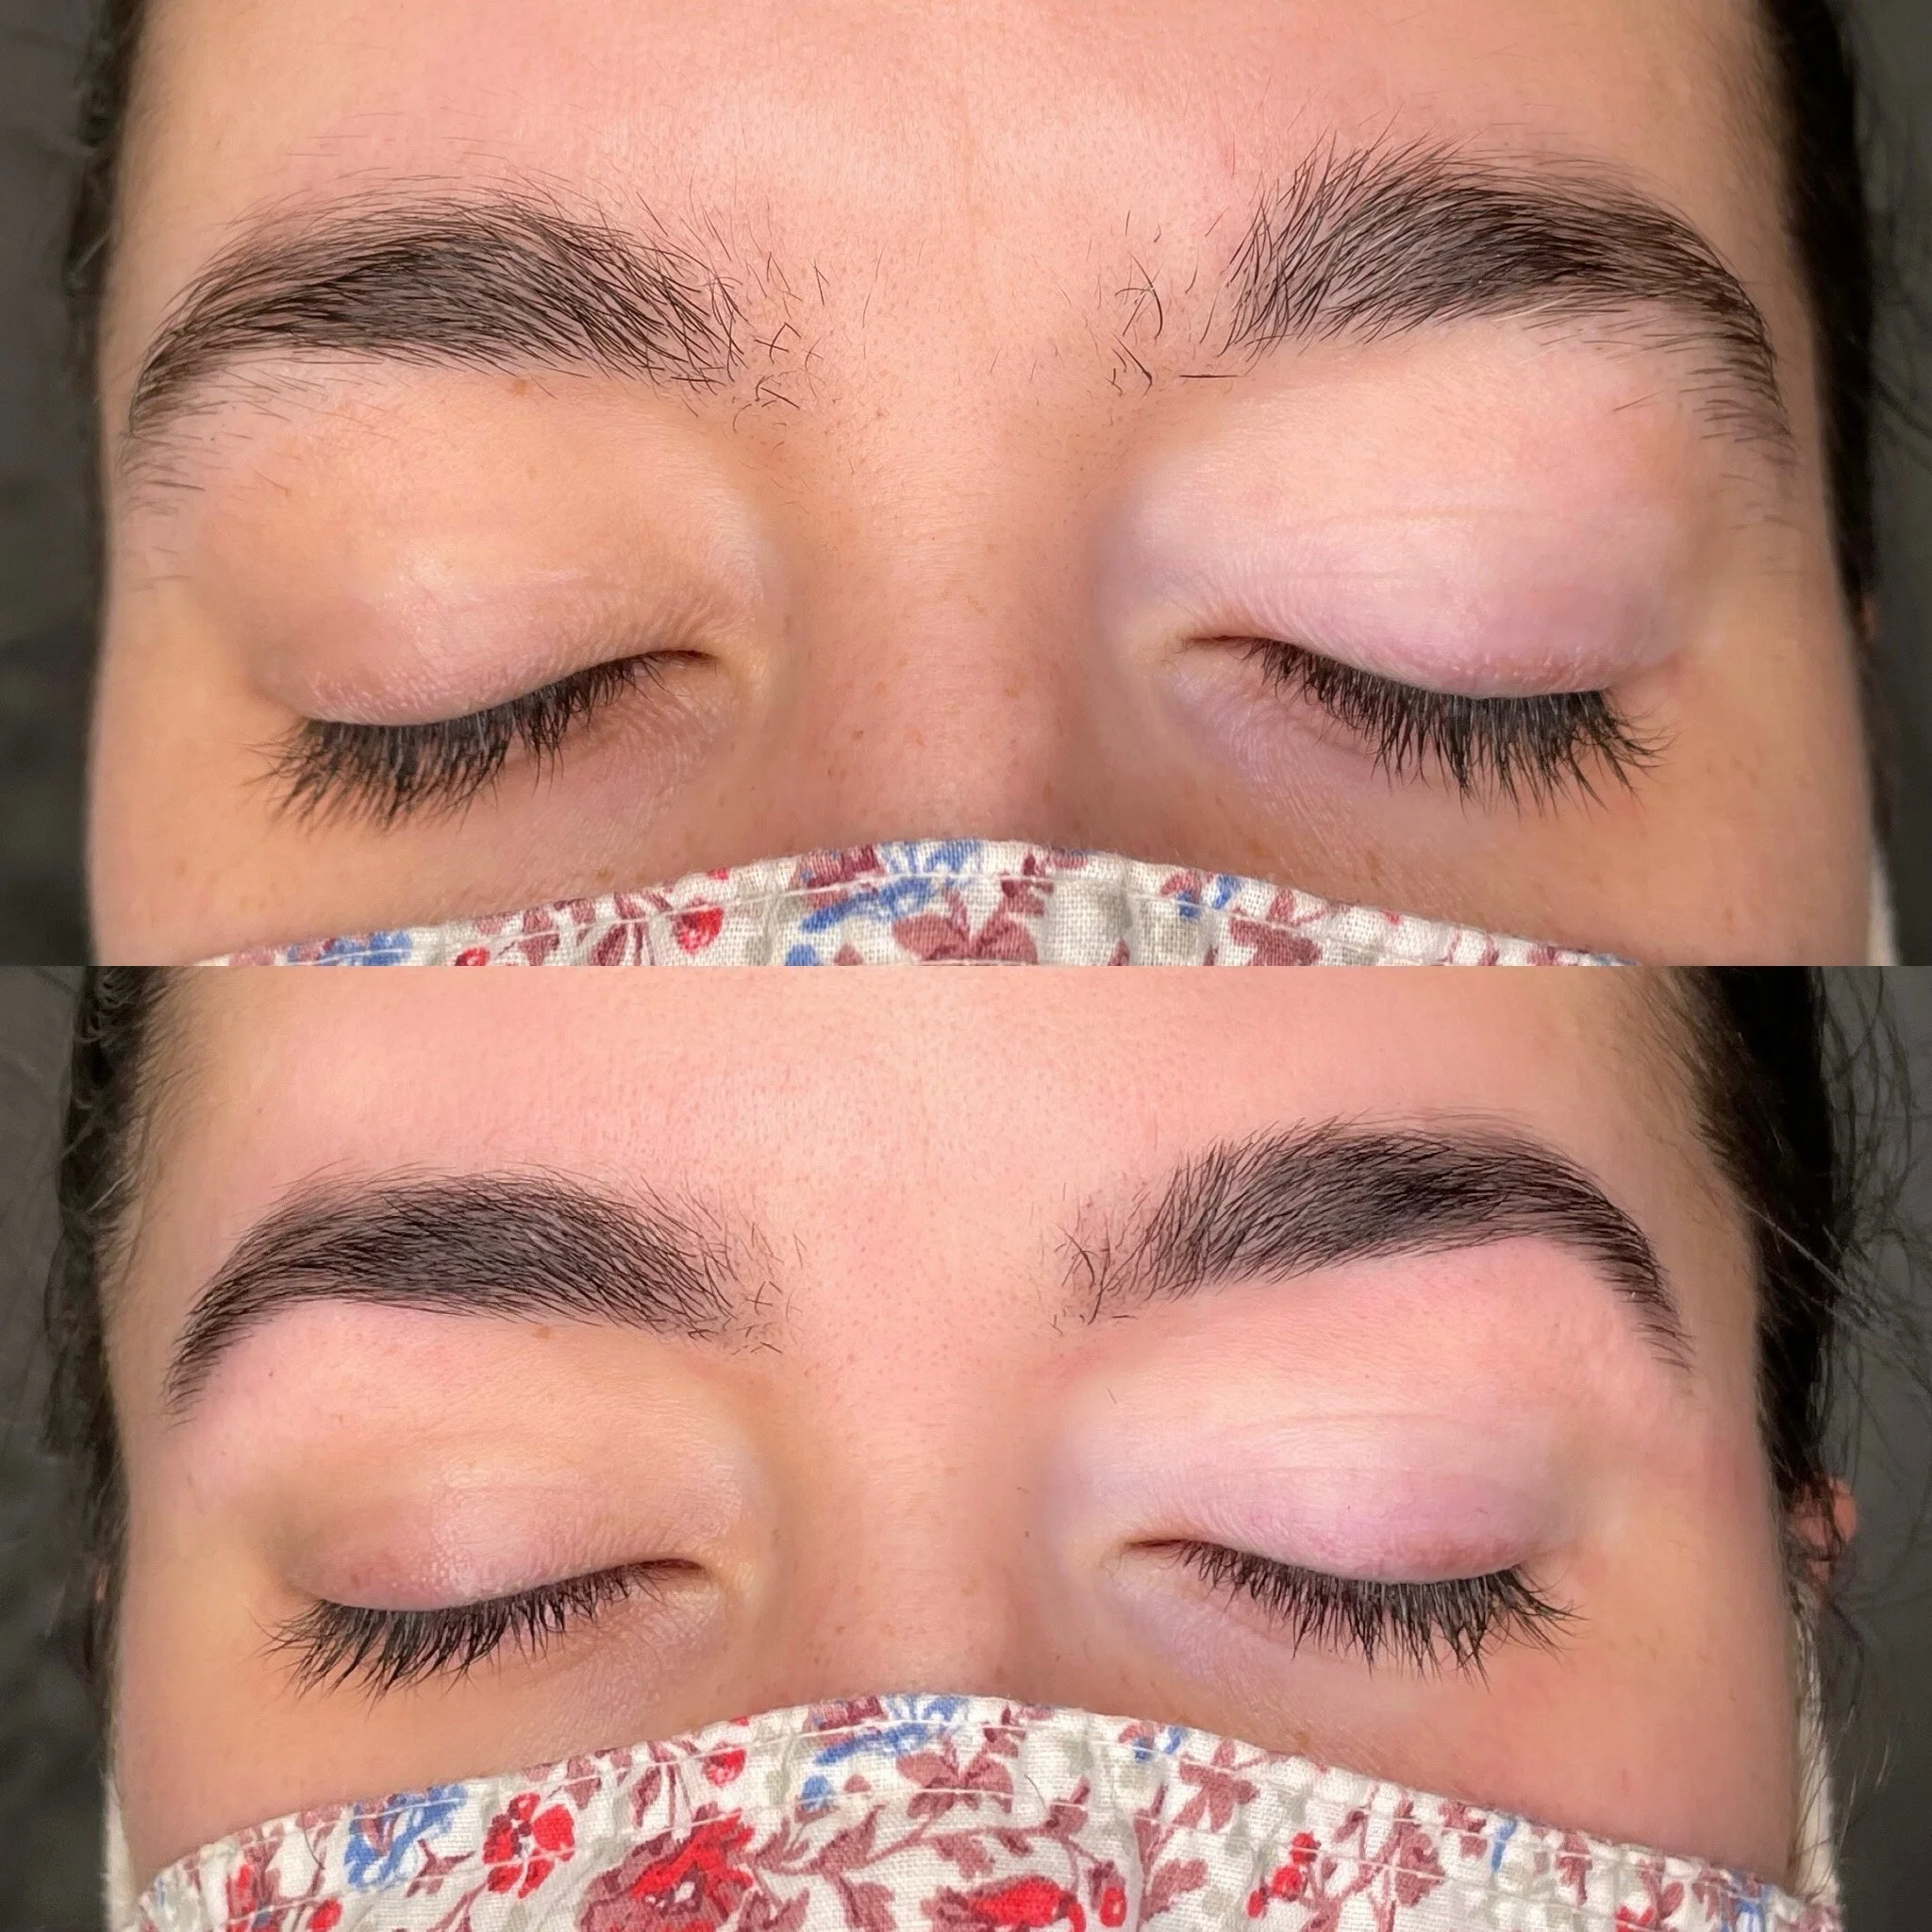
This is a great all-natural way to temporarily tint your brow hairs and skin. Of course, I have had a lot of questions about this service, so I figured I would write out a post all about henna brows and answer the most frequently asked questions.
What is Henna Brows?
I have always loved body henna. During my senior year of high school, I had a friend henna my upper back, arm, and leg to match a dress I wore for a school dance. Probably my favorite look for a high school dance. When I heard of henna brows I knew I would eventually add this service to my books. It took me a while to find a brand I liked, but once I did, I was just so excited!
This is a great all-natural way to temporarily tint your brow hairs and skin. Of course, I have had a lot of questions about this service, so I figured I would write out a post all about henna brows and answer the most frequently asked questions.
I’m sure the first thing that comes to mind when I say henna is a traditional body henna method I mentioned above, known as Mehndi.
This type of henna has been used for generations. It stains the skin and turns to a warm red shade and slowly fades over time. This process occurs because the henna oxidizes, so as it fades the color changes and gets warmer in tone as it fades. Eyebrow henna is high-quality henna with other natural ingredients designed to not oxidize and will stay the same color on your skin and brows. Eyebrow henna ingredients work with the henna to make sure the color stays the same from start to finish.
So why henna and not traditional tint?
Well, there are a couple of reasons why I chose this method over other tints. Traditional tints use harsh chemicals that can dry out the brow hairs. Henna is all-natural and can actually help nourish the brows.
How long will it last?
Henna can last 6-8 weeks on the brow hairs as long as you follow the proper protocol; Don’t wet your brow hairs for the first 24hrs and avoid hot showers or saunas. Henna also lasts 1-2 weeks on the skin as well as the brows, where tint only stains the hairs. How long it lasts on your skin mainly depends on your skin type. If you have oily skin, particularly on your forehead area, it only lasts about a week. If you have normal to dry skin, it lasts about two weeks on the skin.
While almost everyone can get henna brows, there are a few contraindications. If you have broken skin or skin disorders near the eyebrow, G6PD deficiency, or Seborrheic dermatitis, or if you are allergic to henna, this service is probably not right for you.
If you are not sure if you will have a reaction or if it’s safe for you, we can always do a patch test 5-7 days before the service to make sure it’s right for you.
If you are filling in your brows constantly every day and are looking to save some time in the mornings this is a great service. If you have gaps in your brows or areas that you are looking to grow in, henna brows can be a great solution to give you the full look you desire.
Can you do henna over microblading or tattooed eyebrows? If you have old microblading done, you can also henna over the microblading as long as it’s not fresh microblading. I do not recommend this service if you have had microblading within a year.
All my henna appointments include threading or waxing shaping to give you perfect eyebrows.
Want to complete the lazy girl who has no time in the morning for a makeup look? Then pair henna brows with an eyelash extension service. Who has time in the mornings for makeup anyways? Well, this way your lashes and brows will look perfect every morning.
Are you ready to book your service?
Just click the link here to get started!

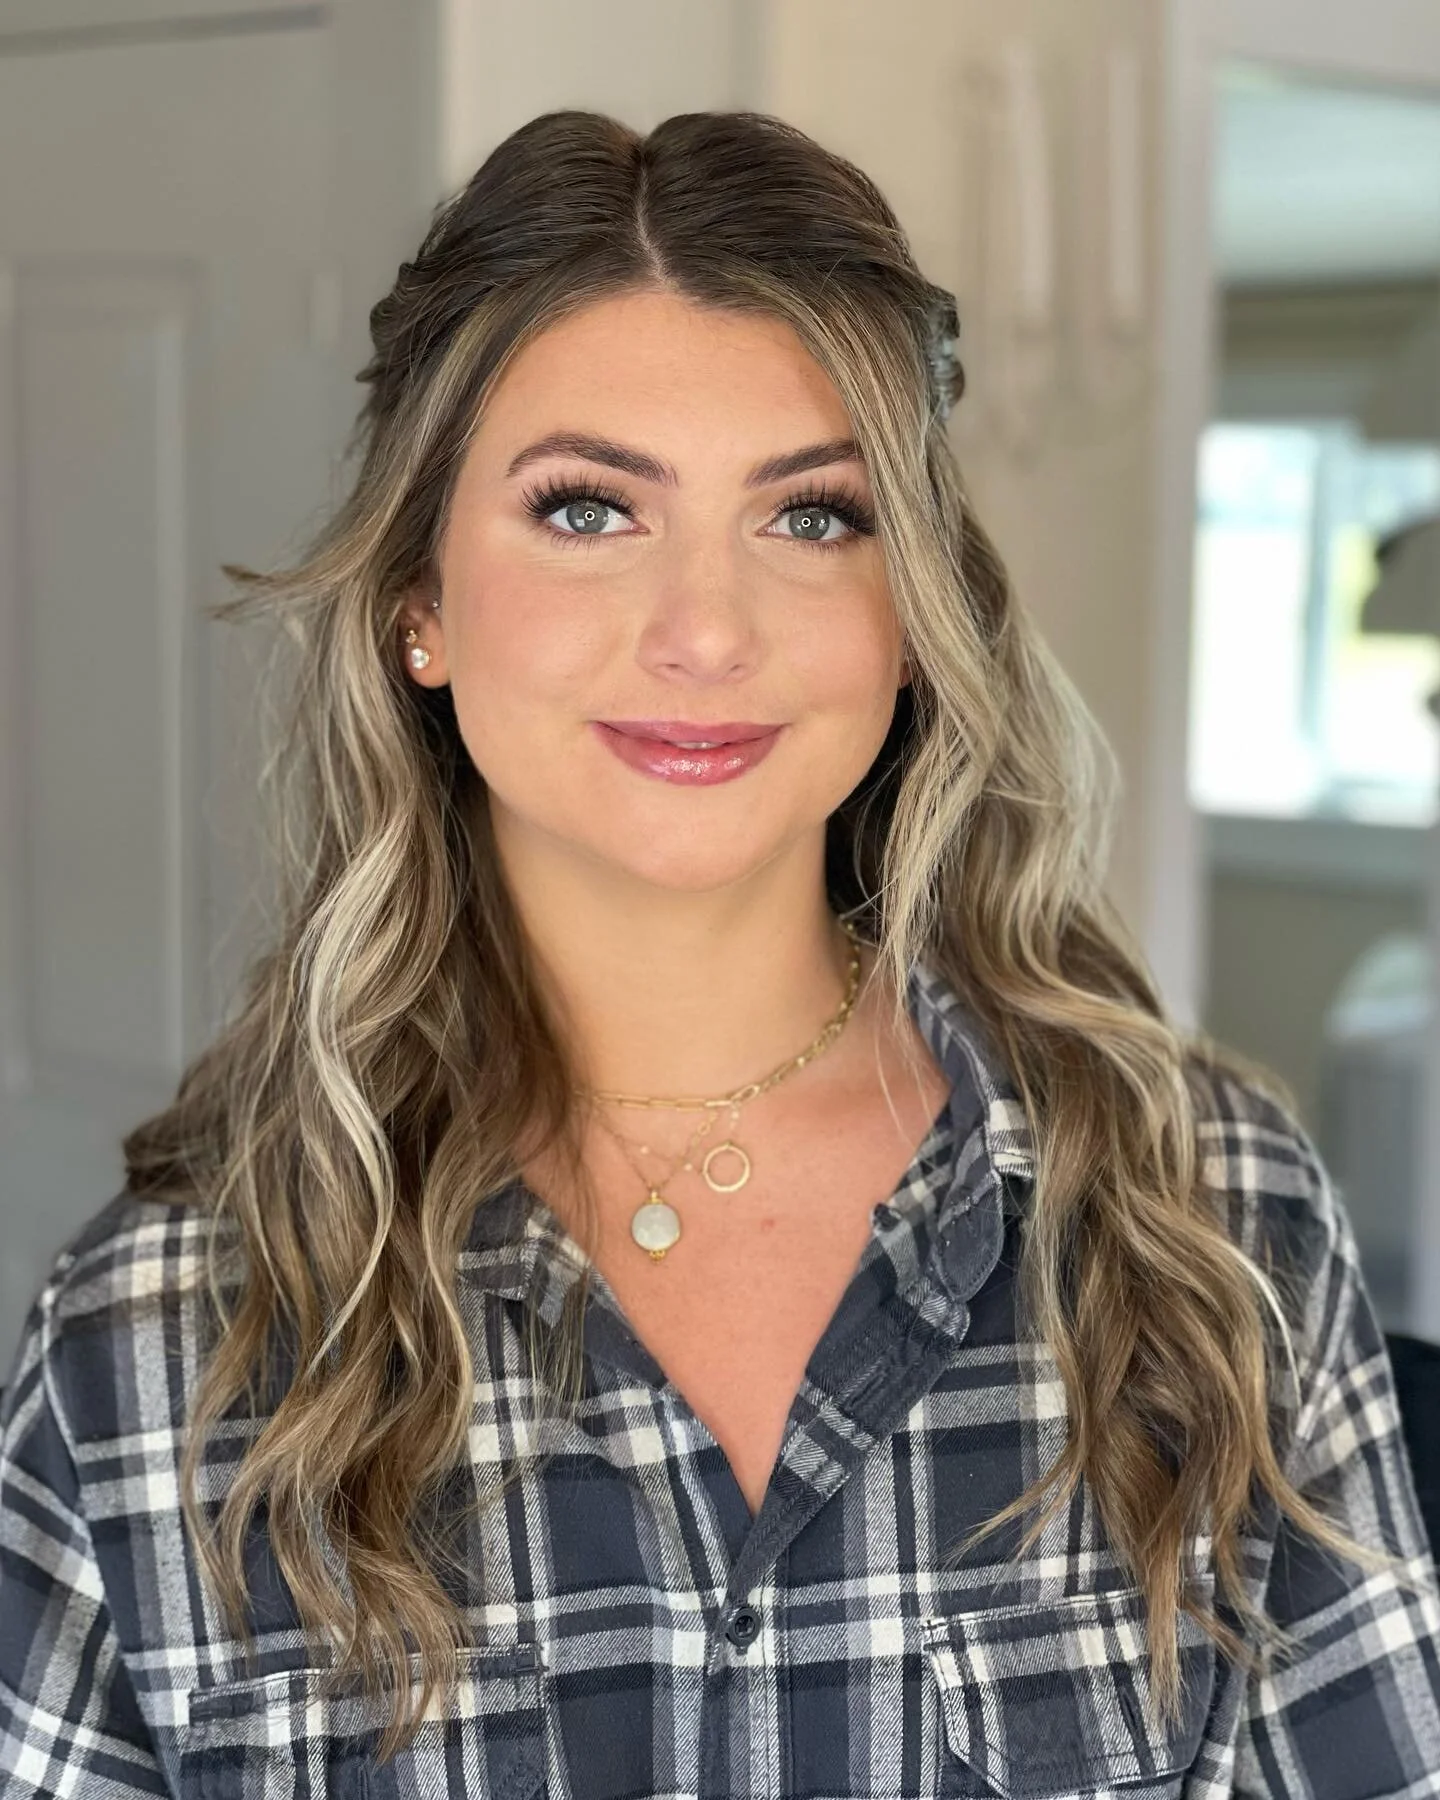
How to Book Your Wedding Makeup
To help with all your wedding makeup needs is this blog post. Basically the 411 on booking wedding makeup. All the basic questions I get asked and an overview of the entire booking process.

Wedding season is fast approaching, and finding a makeup artist can be a little bit of a process. I try and make the process as simple as I can for my brides. But it can still be overwhelming combined with everything needed to schedule when planning a wedding. To help with that is this blog post. Basically the 411 on booking wedding makeup. All the basic questions I get asked and an overview of the entire booking process.

How soon should you book your artist?
To be completely honest this varies. The biggest variable will be the time of year you are getting married. Each town has a few months that book up pretty fast. For example, I’m writing this post at the end of December 2020 and my month of May 2021 has been completely booked for a few months now. Typically in Chico CA, I have found the most popular months to generally be May, the beginning of June, September, and October.
To be safe, once you have your venue and date set, reach out to the artist you want to get the process started.
How does the booking process work?
For me, the best way to book is to fill out the wedding booking tab on my website here. I created a general questionnaire for you to fill out letting me know the basic information about you and your wedding date. This is the easiest way for me to:
Make sure I have that date available so I can then send you over all my pricing and booking information.
If I don’t have the date available I will always send you referrals and contact information of other artists I know who I think will be available. This way you will not be left empty-handed at square one.
So what’s next?
Once I can verify that the date you want is open, I send you a general information sheet explaining my pricing for all services, products I use, a little about me, and how to secure your date by confirming and booking your trial appointment. Please read through this document. It has important information about what is included, late fees, holiday charges, lashes, and products I use so you are prepared moving forward. Once you have read through it to secure your booking I just need a confirmation of your wedding date and we book your bridal trial.

Bridal makeup trials are a requirement of all my brides. It gives us a chance to preview your look to make sure it’s exactly what you want and if you would like to make any changes. This is also where I have you sign the contract confirming the makeup start time, location, and how many people are getting makeup done. I love doing trial sessions because it’s a great opportunity for me to get to know you better. A few questions I typically ask; how did you meet your fiancé? How did he propose?
What your wedding colors are? What your dress looks like? Is your ceremony outside or inside? Did you pick a hairstyle yet? These questions help me get a feel for the makeup look you will be wanting.
I book out two hours for this session so we have plenty of time to talk and discuss the look and make sure it’s perfect. If you have a couple of different looks you are deciding between I usually suggest doing two eye looks, one on each eye. One always makes your eye pop more than the other and it’s different for everyone. So if you don’t know exactly what look you are wanting, this is a great way to figure it out.
I typically recommend booking this session 4-6 weeks before the wedding date. I do bridal trials during the week, I reserve weekends for weddings.

Great! We have done my trial! What’s next?
Once we have completed your trial, all that’s left is the wedding week! I usually check in with my brides around Wednesday or Thursday just to confirm everything and layout a general timeline. Then on the day of your wedding, I arrive at about 10-15 minutes before the start time to set everything up. Then we start the makeup process and get you ready for your big day
I hope this helps you get a clear understanding of the bridal makeup process. I tried to make it as easy as possible while also giving you thorough information and understanding.
Thank you for reading, and if you're a soon-to-be bride CONGRATULATIONS!
Xo,
Annie
photos by Ashley Carlascio and Kelly Kirklin

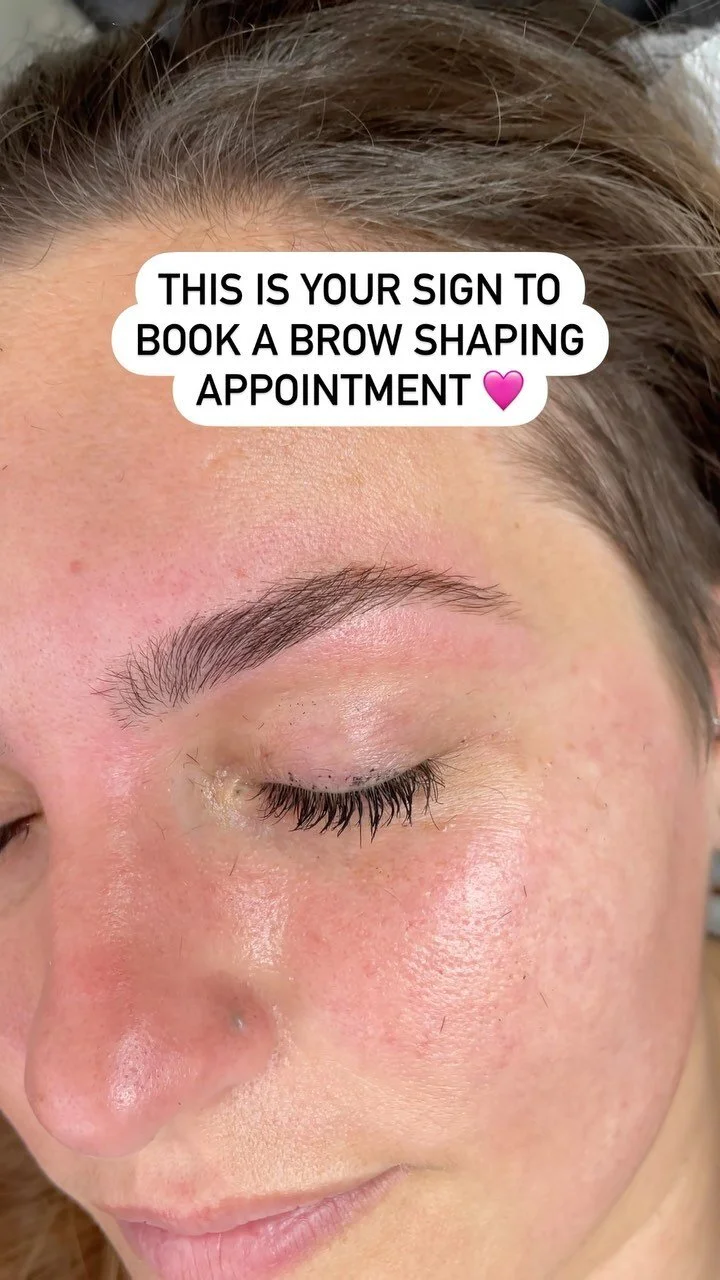
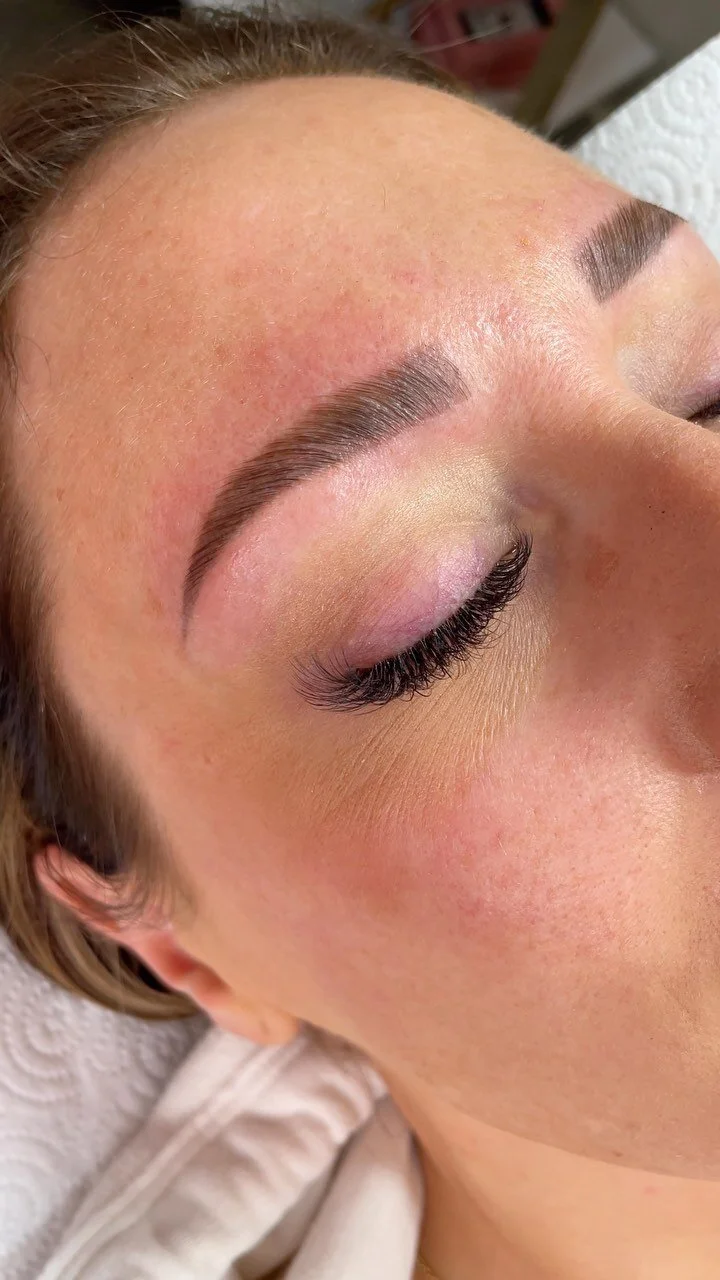
Want Supermodel Eyebrows?


I have always been obsessed with good eyebrows. Some personal favorites are Cara Delavine, Addison Rae, and, Taylor Hill. They all have great bold, fluffy brows that stand out in such a lovely way.
So what’s the secret to their bold eyebrow looks?
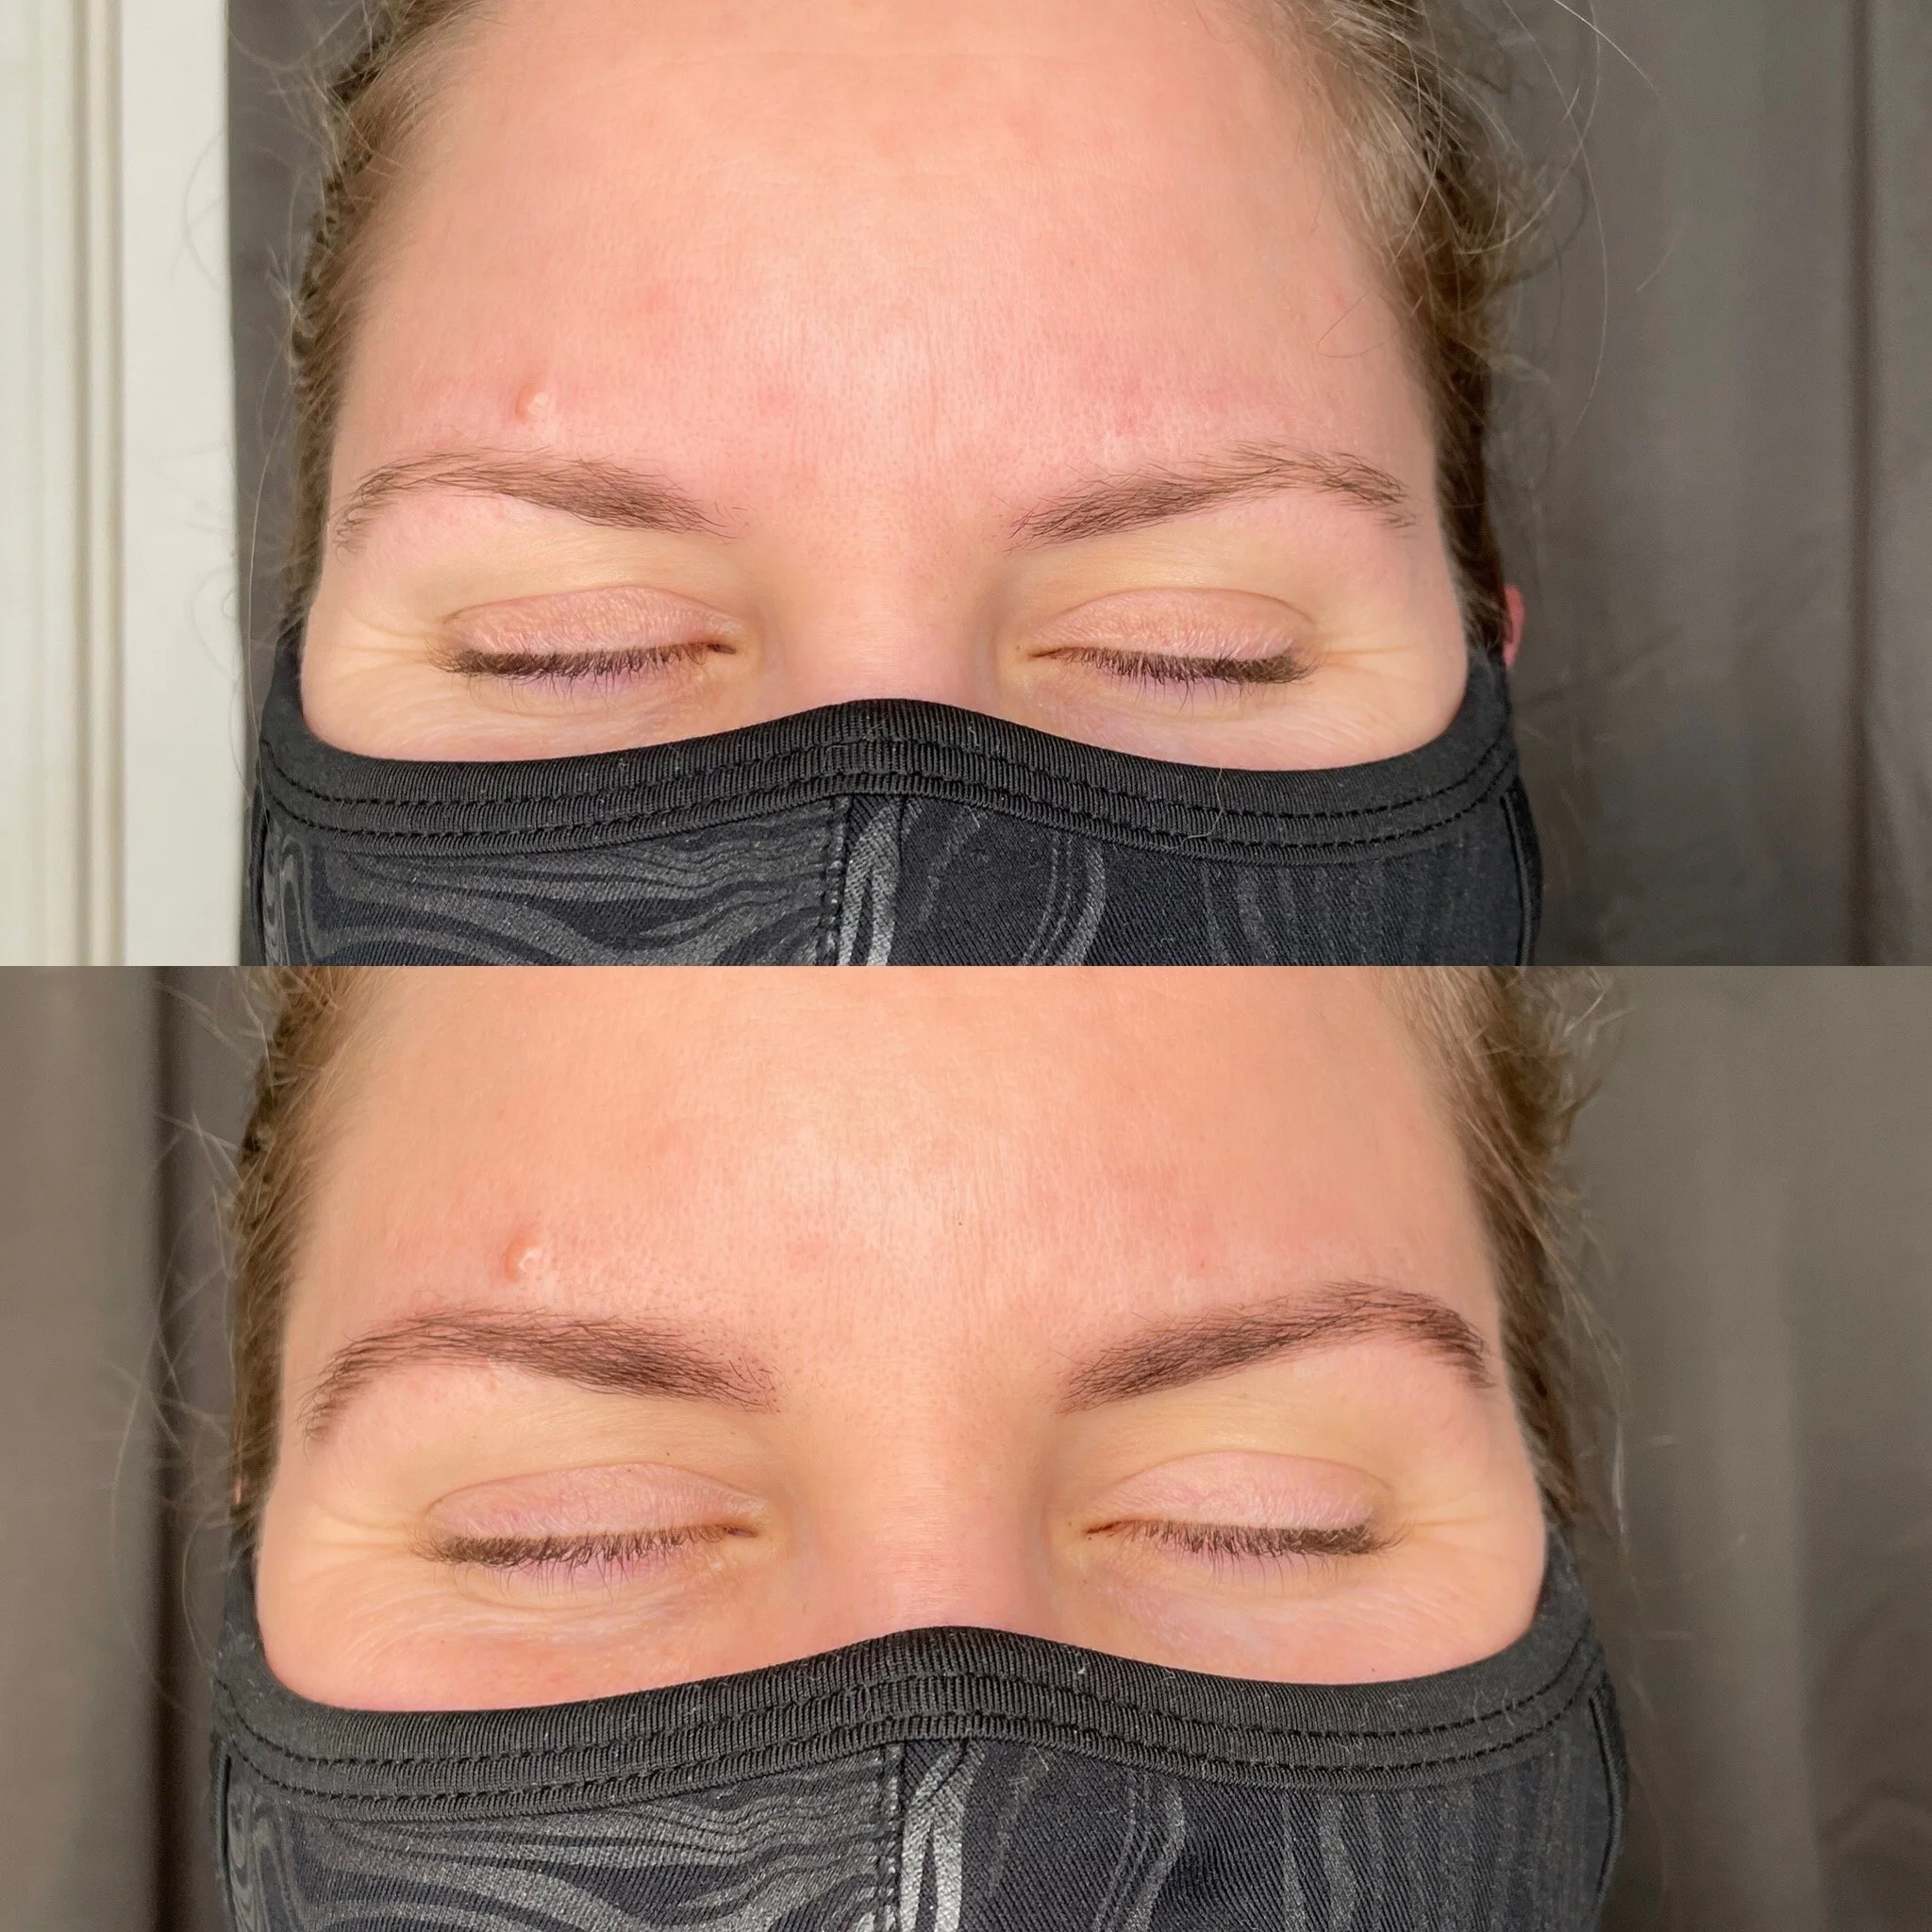
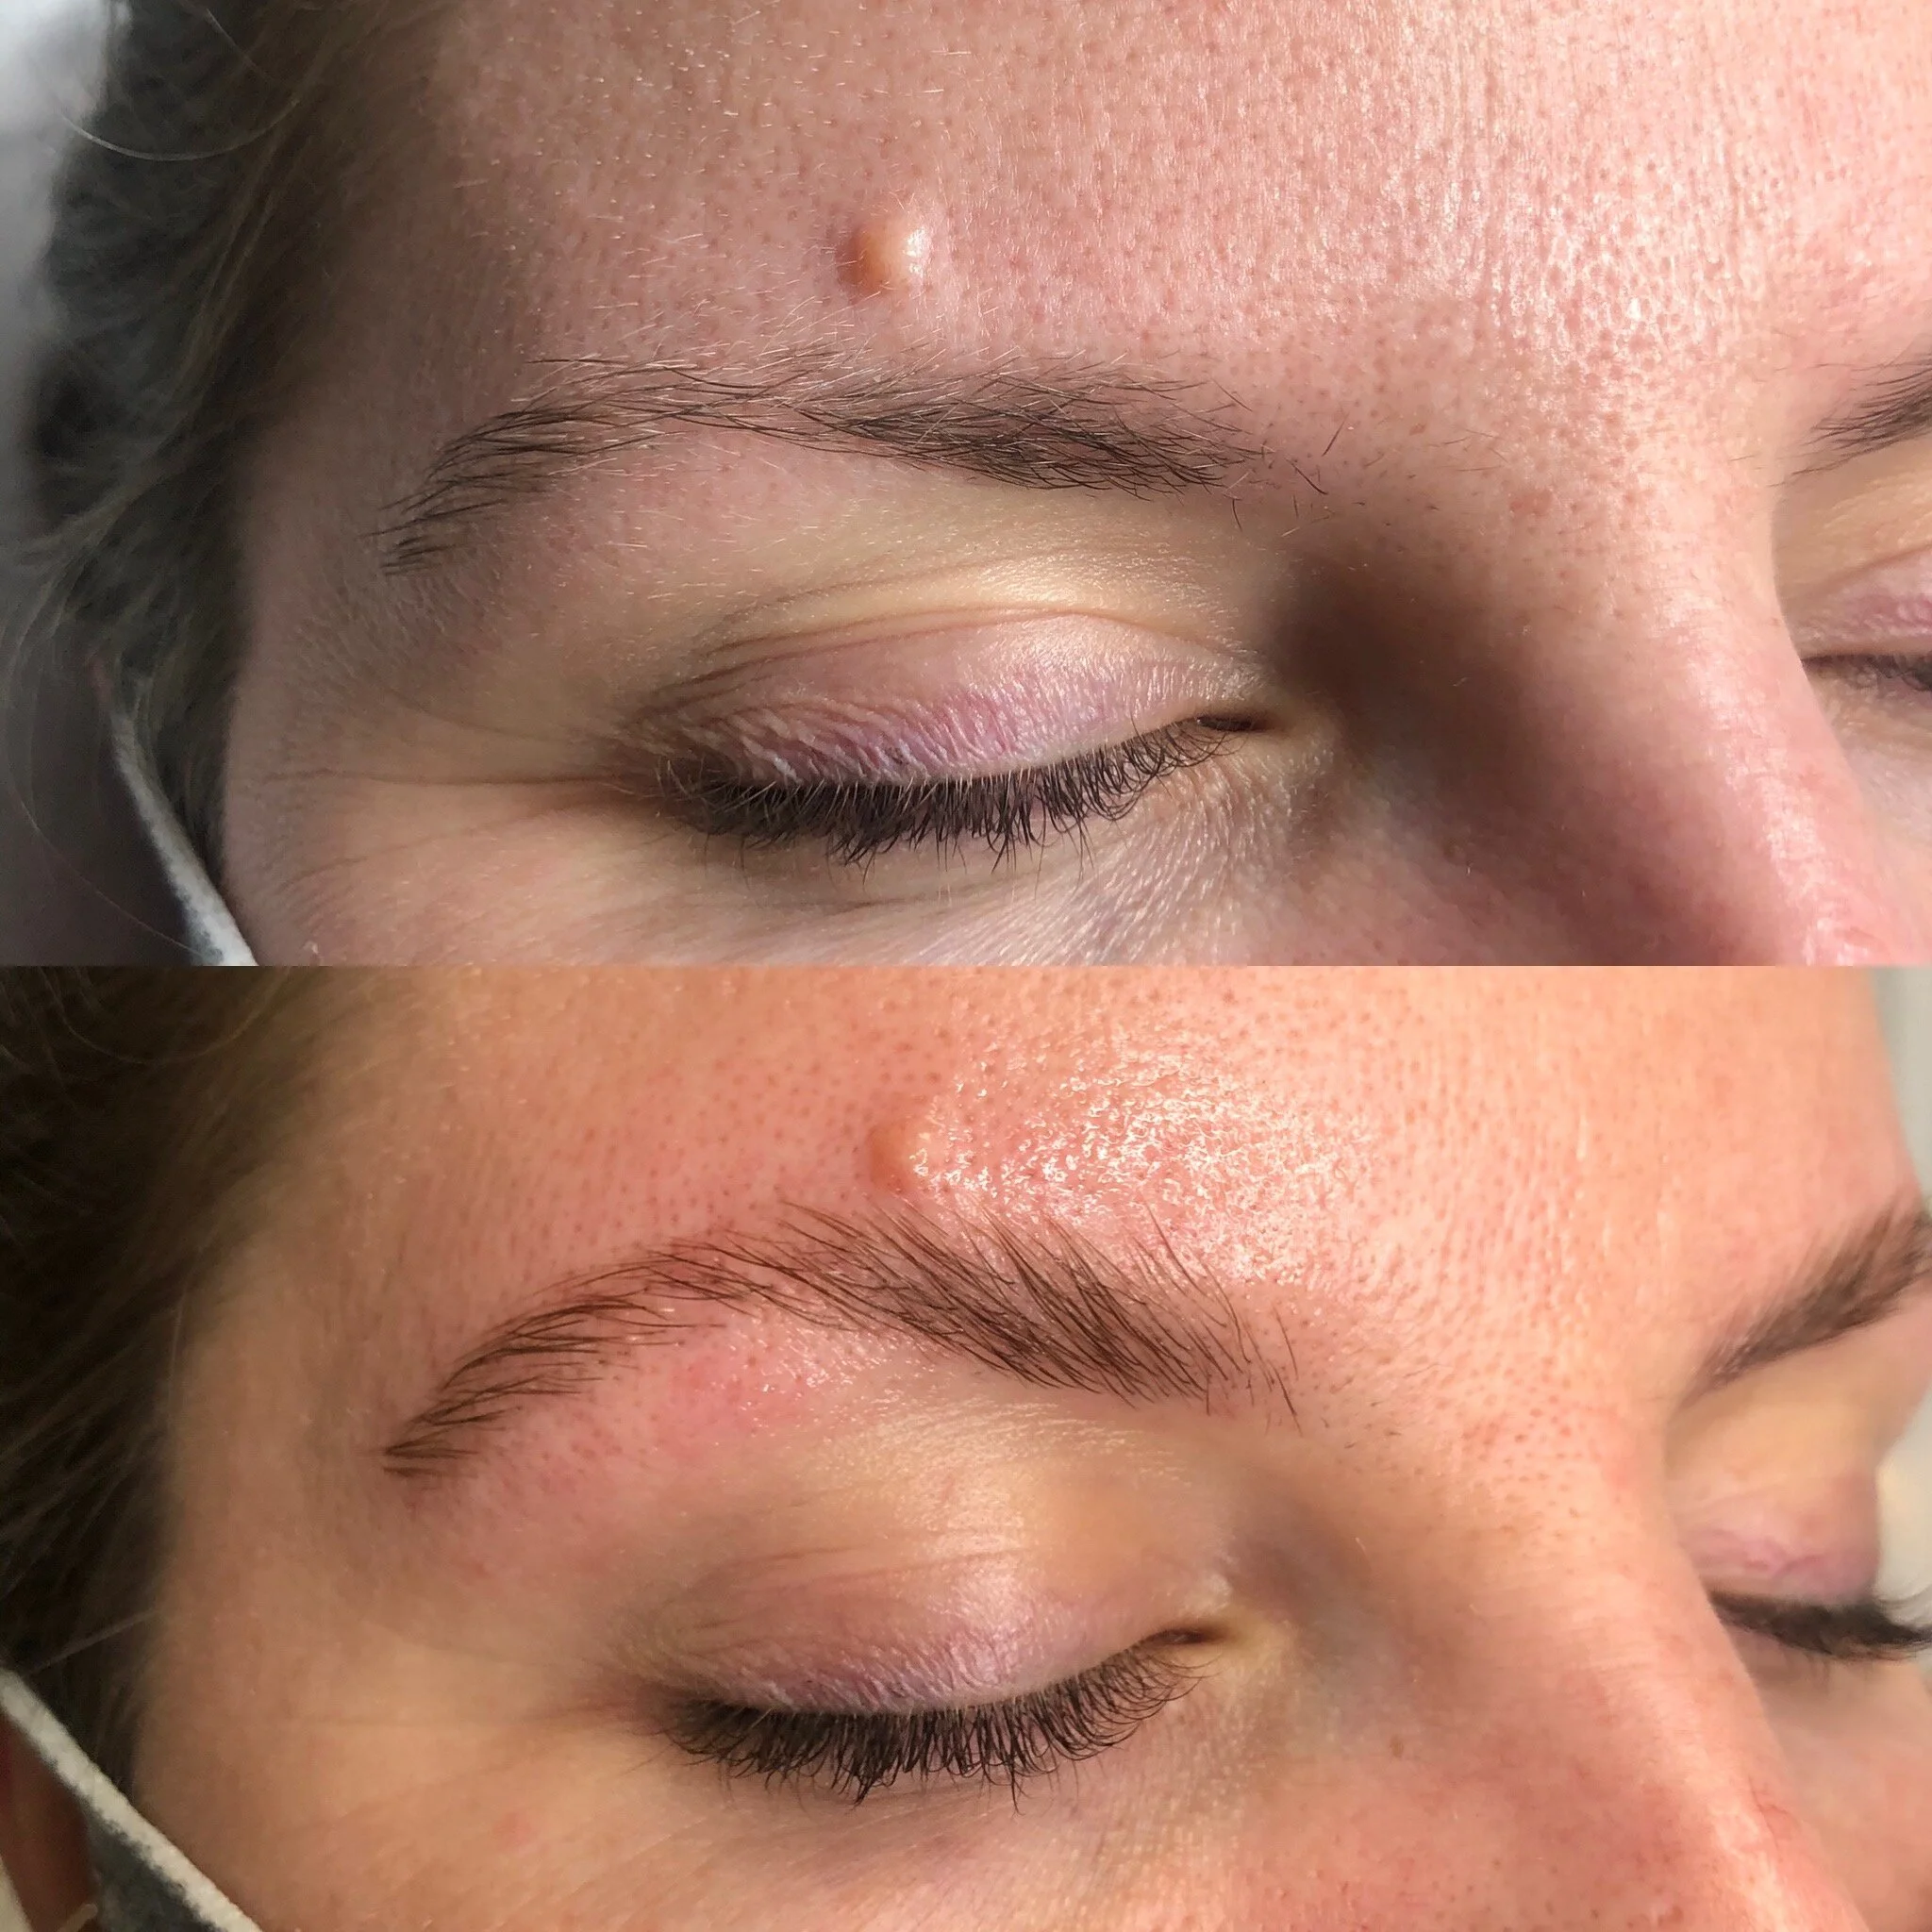
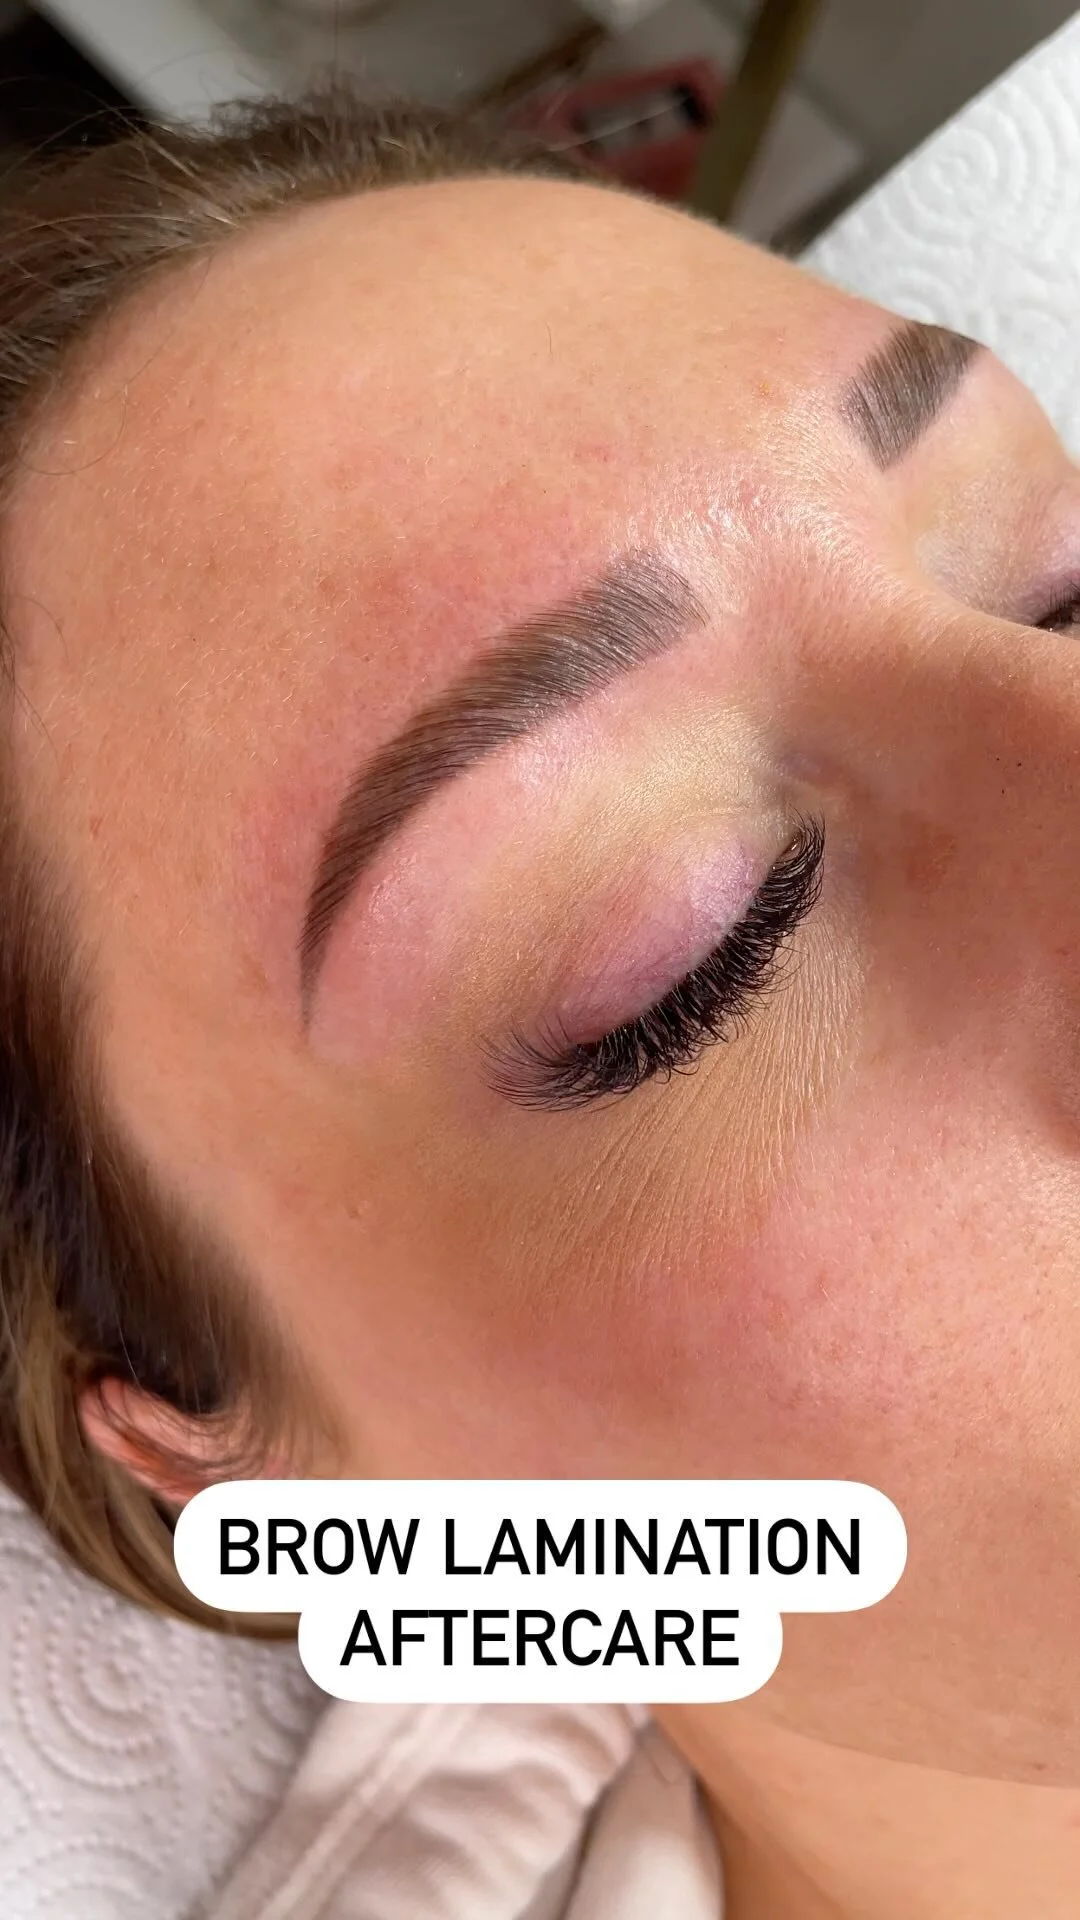
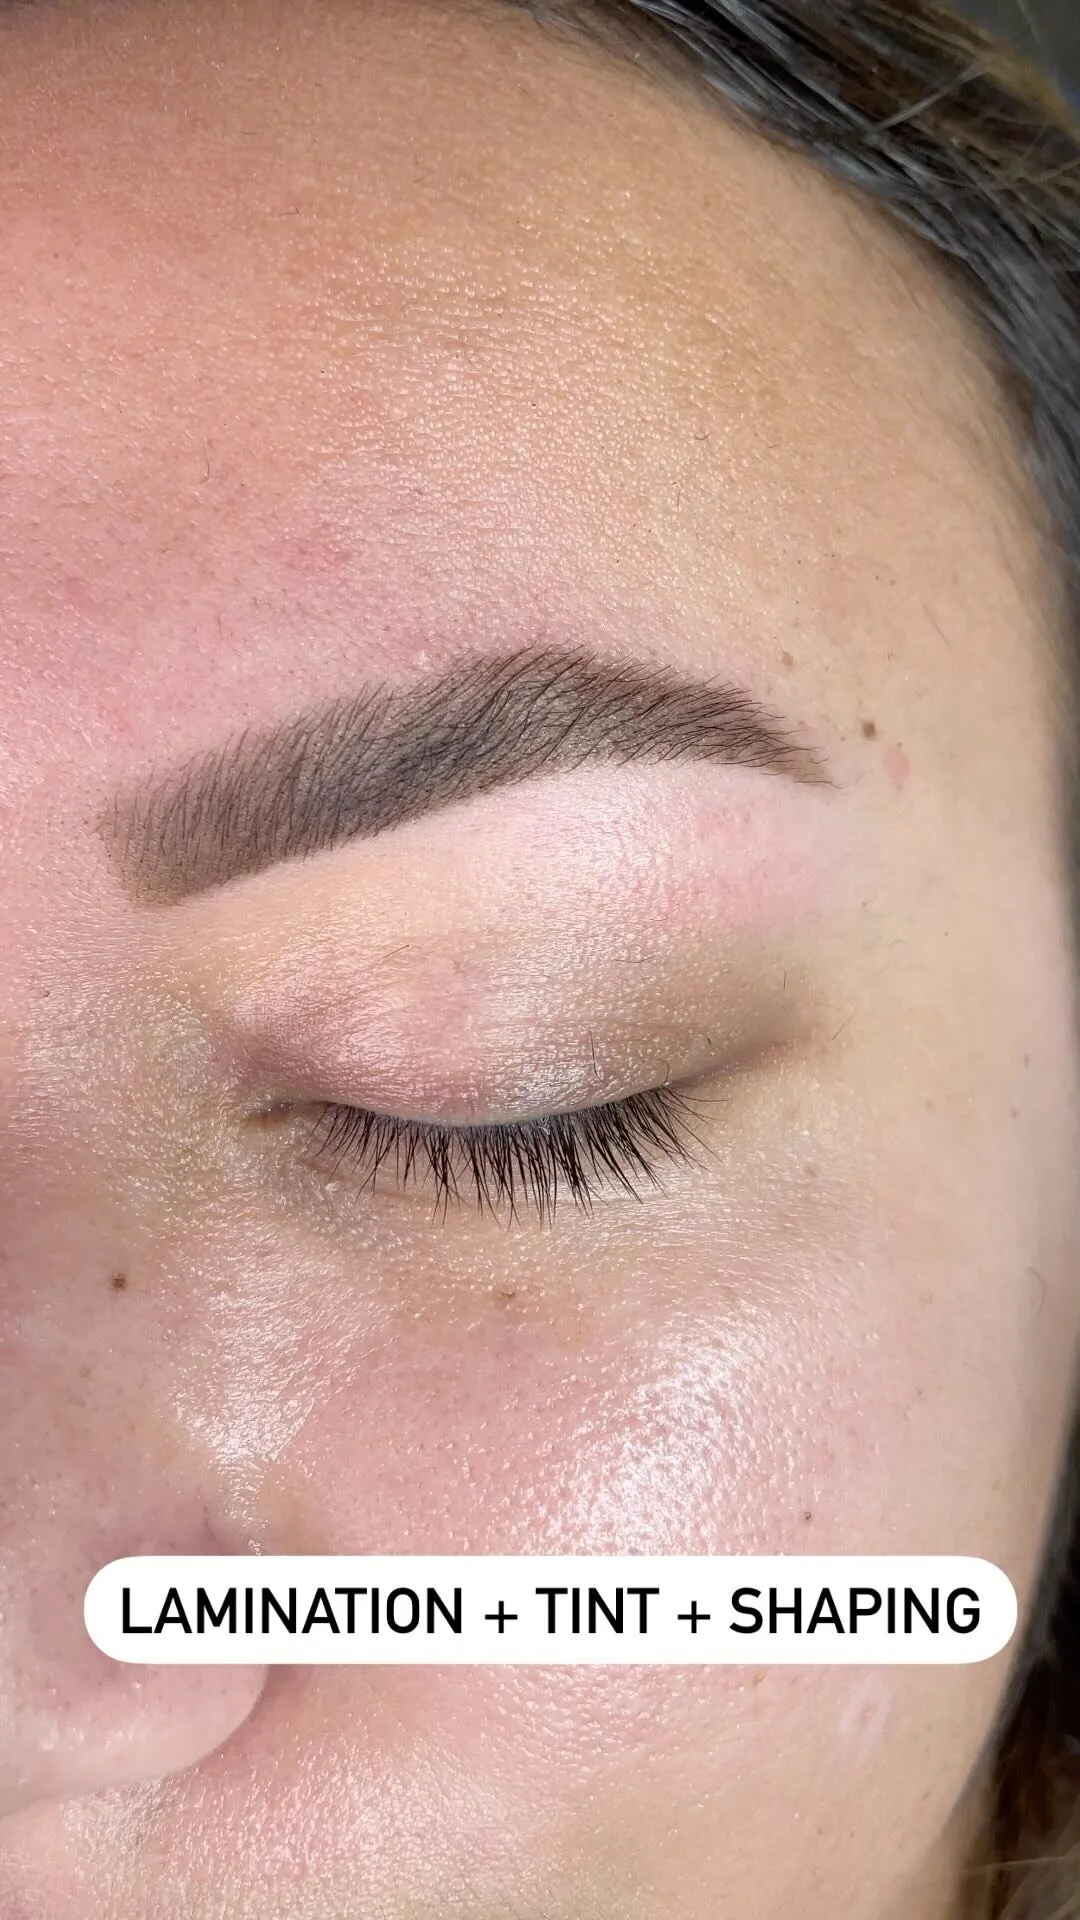
Eyebrow Lamination. This is the newest service that gives you fuller, fluffier eyebrows that are worthy of the supermodel status.
So what is eyebrow lamination? And how does it work?
Eyebrow lamination is a three-step process that softens your brow hair’s natural structure then reforms the way they grow to give you more natural and fuller looking eyebrows.
It takes about 45 minutes to complete. The first step is designed to break down your eyebrow hair’s current bonds and open up the cuticle.
Once this is processed we apply the setting lotion. This lotion helps reform your brow shape to make them go the direction you want and stay there. Think of it as a long-lasting eyebrow gel.
For people whose eyebrow hairs grow straight out, or down, this service helps reposition those hairs to grow up and blend to the shape of your eye. Giving you a fuller more defined look.
I also include an eyebrow threading within your appointment for flawless brows in one sitting.
After threading a nourishing oil is applied to help bring moisture back into your hairs so they stay healthy and continue to grow.
You are gifted with a brow balm specifically designed to help keep your eyebrows hydrated throughout the day.
A few things to keep in mind. This is not a permanent service, it lasts for about 6-8 weeks and then you will need to get touch-ups.
Your eyebrow hairs are not permanently stuck in one position. Your hairs do still move like normal, this allows you to customize their shape.
Most of the time I like to just brush mine out at an angle. But sometimes if I want a more dramatic look they can be brushed straight up for a fluffier look.
You can still use eyebrow products to fill them in if you like your eyebrows darker.
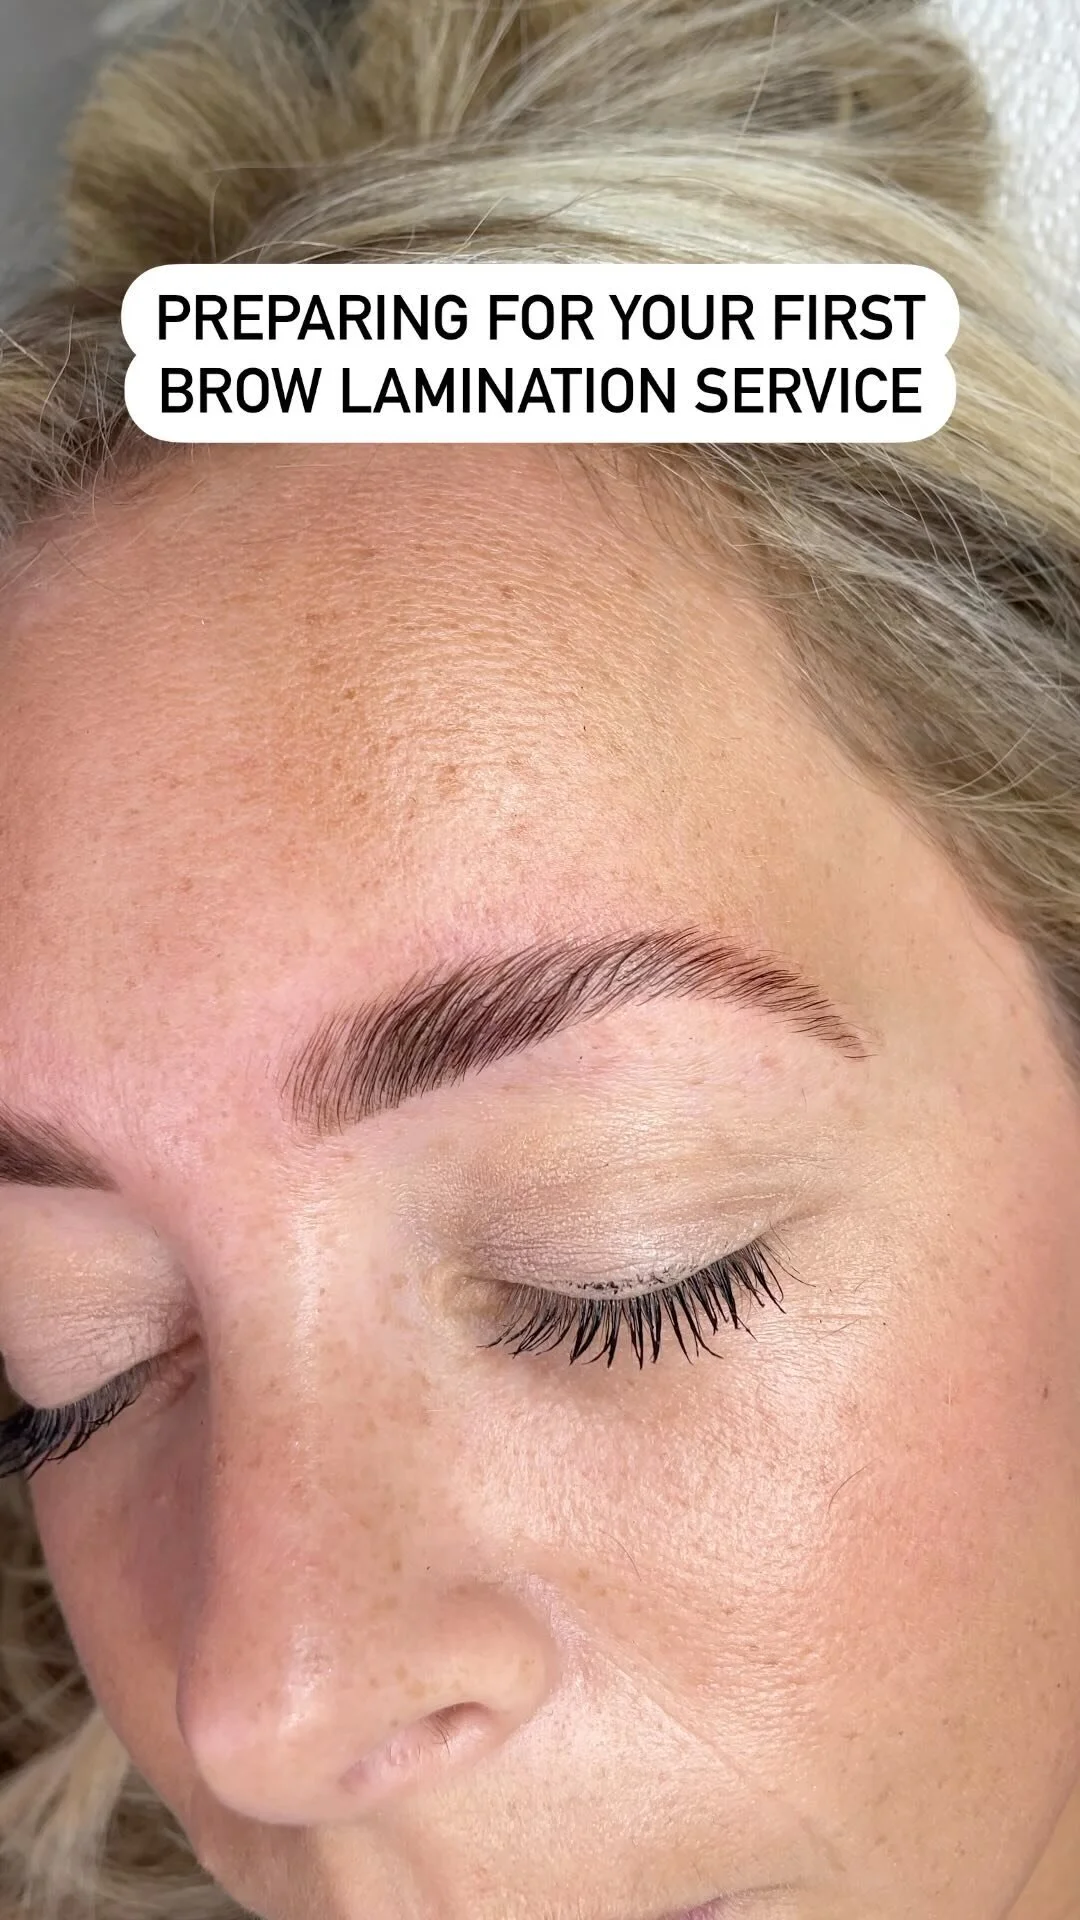
My pro tips for getting the best lamination service:
grow your eyebrows out and don’t touch them for 3-4 weeks. This gives them plenty of time to get nice and full. The results will be worth it trust me.
Schedule a threading appointment with me first. This way I can determine if you are a suitable candidate for eyebrow lamination.
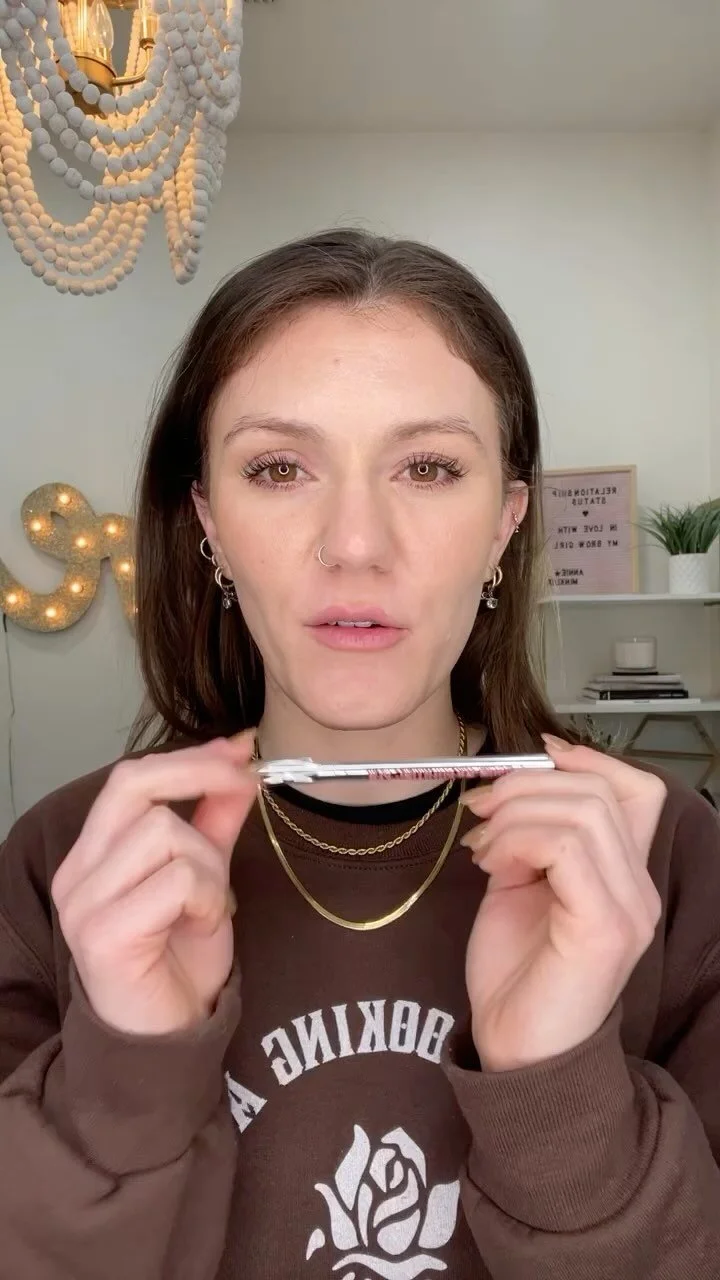
I love filling my brows in with a pencil and then applying the nourishing balm. This gives them a bold and beautiful look (i.e. my supermodel dream brows!)
Want to learn more about this service? Lets book your introductory threading appointment here
Connect with me on social media @beautybyanniemink
Thanks for listening lovelies,
Annie

Which sunscreen is right for you?

How many of us heard growing up, “you need to put on sunscreen before getting in the pool” during the summer months?
Maybe this was just me because I have very fair, sensitive skin and grew up here in Chico California, where summers are 100+(last weekend got to 108!). So the main outdoor activity was swimming. I have a feeling many of you also experienced similar situations as kids. I know you probably also had parents who made you apply sunscreen and then wait 30 minutes till you were allowed to get in the water. The torcher!
It wasn’t till now that I really learned and understood why sunscreen is so important and why we need to take our parents’ words seriously. Exposure to the sun has been linked to skin cancer, and premature aging skin.
With so many different brands and types of sunscreen, it’s hard to know what to use, when to apply, and how often you should be applying sunscreen. Let’s dive into the topic of skin protection! (Pun not intended) Hopefully, by the end, you will be just as excited about protecting your skin as you are for summer pool parties.
There are two types of sunscreens. Physical and chemical. Both protect you from the harmful UVA/UVB rays, these rays absorb into our skin and cause premature aging, wrinkles, and sunburns. However, the active ingredients, and ways they protect you are very different. There are pros and cons to both of these sunscreens, knowing when to use one over the other will help keep you better protected.
Physical sunscreen is mineral-based. It is made up of zinc oxide and titanium dioxide. These ingredients work by sitting on top of the surface of your skin and block the UVA/UVB rays from entering your skin. Think of this type of sunscreen as an invisible shield for your skin. This type of sunscreen is great for everyday use on the face. It's great for people with skin sensitivity or acne-prone skin. It’s long-lasting in the sun, but can be rubbed or sweat off so it will need to be reapplied. Some brands now offer facial zinc spray that can be reapplied over your makeup for convenience.
Chemical sunscreen contains organic, or carbon-based compounds like oxybenzone, octinoxate and avobenzone. These compounds create a chemical reaction by changing the UVA/UVB rays into heat and then release the heat from the skin. Imagine this type of sunscreen as a superhero, whose superpower allows him to absorb UV rays and then turn that energy to shoot heat lasers. This type of sunscreen is better used on the body during physical activity. It will not sweat off as easily as a physical sunscreen, but should still be reapplied. If you have rosacea, this option may not be best as it produces heat in the skin and this can cause rosacea flare-ups.
Both types of sunscreen should first be applied with lotion first. That way you make sure to get it evenly applied onto your skin. Spray sunscreen can be used for reapplications, but should not be used as your base. Sunscreen should be reapplied about every hour. If you are in direct sun for extended periods of time consider reapplying more often. In terms of SPF, anything over 50 is simply a marketing ploy and will not give you extra protection. Stick to SPF 30-50 for the best protection. I have always had the worst luck with sunscreen and getting terrible sunburns. It wasn’t until this year when I learned about these differences and how often to apply sunscreen that I really understand how important it is for your skin.
I hope these tips will help you be more aware of this coming year of the importance of sunscreen.
Bonus tip: consider adding a topical antioxidant to your face before applying sunscreen. Antioxidants help neutralize the free radicals on your skin and work with the sunscreen to help give you better protection.
Have questions about sunscreen? feel free to email me HERE
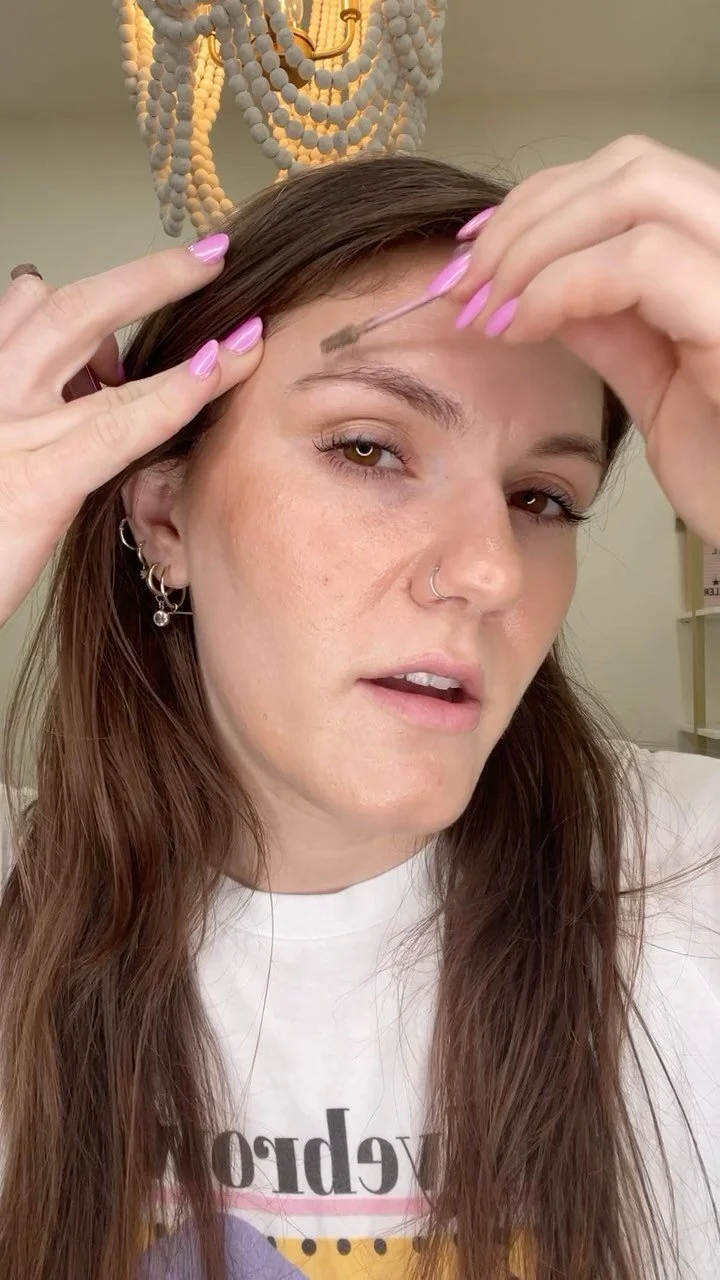
Eyebrow Shaping 101 pt. 2

Alright, now comes the fun part, learning how to fill in your eyebrows! Filling in your eyebrows helps to brighten up your face and create a more defined shape. First thing I tell all my clients, especially those who have their eyebrows shaped for the very first time: Like any new technique or skill, it takes time and practice to master.
I like to use an eyebrow pencil when filling in clients’ eyebrows. There are many different products available. I also use powders, brow gel, and creams but I have found pencils are the most forgiving product and easily blended into the eyebrow hairs. It is also the best for reshaping or correcting your eyebrows. You want to make sure you are first using a color that matches your eyebrow hairs.
For brunettes, choose a pencil that is one to two shades lighter than your hair color. Eyebrow pencils tend to be a bit cooler in color and once applied to the skin they warm up and blend in. Choosing a darker color can potentially make your eyebrows a little too dark (unless that’s the look you’re going for). In contrast, blonde-haired ladies, you want to choose a color one to two shades darker. Blondes tend to have really light eyebrows, so in order for them to be seen, the pencil needs to be slightly darker. I mainly use a taupe or dark brown color and find that those shades work for almost everyone’s eyebrows.
Once you have picked the right pencil, you’re ready to start filling those babies in! Start with the pencil in the bottom inner corner of your eyebrow, closest to the nose. Follow the bottom line of your eyebrow with your pencil in a straight line out to your arch. Then go back through with a clean mascara wand and blend up and through your eyebrow hairs. Make another line starting at the top inner corner of your eyebrow and across to your upper arch. Once again, be sure to go back and blend your line through the hairs, this helps to provide definition to your eyebrow shape, while also keeping the natural look. Now, starting at the top arch of your eyebrow, using your pencil follow the line of eyebrow hairs down the side of your face and blend.
To give the appearance of fuller eyebrows, start your line from the top of the arch out a little further than your eyebrow hairs. This creates an “arch” in your eyebrows, then drop the line down the side of your face a tad higher than your eyebrow line. Then, make a line from your lower arch line out to connect the top line at a point on the side of your face. From here, brush and fill in any of the gaps you may see. For someone who has straight eyebrows that don’t drop down the side of the face, the easiest way to make them appear fuller, and longer is to simply extend your pencil line out about 1-2 centimeters. Start by drawing a line at the top arch, where your brows end, and extend your line down. Then draw another line from the bottom point of your brow down to meet the other line. This should create a thin triangle-like line. Lightly fill in any gaps that may fill be seen and light blend out the lines with a mascara wand to make them more natural.
Now that you have the basics of eyebrow shaping down, your next step would be to grow and leave your eyebrows untouched for 2 weeks! Even if you’re a tweezer, this means no tweezing or touching up! Then you will want to schedule an appointment to get your eyebrows done. Remember, you can always let your eyebrow expert know the desired shape you are going for. It might take a few appointments to get there, but that is the beauty of filling in your eyebrows.
Start experimenting with shaping and filling in your eyebrows. You will be pleasantly surprised by how much it can enhance your face and brighten your eyes!

Eyebrow Shaping 101

How To Find Your Perfect Eyebrow Shape
Part 1
I am so excited to talk about all things eyebrows! I specialize in eyebrow threading and I have been doing it for almost 4 years now. Naturally, I realized I have a lot to say on this topic so I decided to break it down in two parts. Part 1 is designed to help you discover your natural eyebrow shape and face shape. Part 2 will then be focused on learning the different techniques of filling in your eyebrows. I love showing my clients how to properly fill in their eyebrows. My hope is that you learn a few helpful tips to confidently fill in your eyebrows like a pro.
I love being able to bring a person’s face to life by simply shaping their eyebrows to give a more defined look. A simple thing like adding a small arch to the eyebrow, or cleaning up all the hairs not directly in the shape of the eyebrow, can make a huge difference. I highly recommend for everyone to see a professional when it comes to waxing or threading your eyebrows. It’s also very important that you know how to properly communicate the desired eyebrow shape you are wanting to your specialist.
So how do you figure out what eyebrow shape works best for you? Well, first you want to know the natural shape of your eyebrows. There are three main shapes that eyebrows have: arched, rounded, and straight. The best way to determine which shape you have is to look directly into a mirror at your eyebrows, starting on the inner corners closest to your nose. Bathroom mirrors are usually the best because they have the best lighting!
If your eyebrows follow the shape of your eye straight out towards the side of your face and angle up to a point then drops down at a 45-degree angle, then you have more of an arched shape. This shape is popular for its more defined and clean lines.
The round-shaped eyebrow is similar, it follows the shape of the eye out and tapers down the side of the face. The main difference is a rounded eyebrow does not arch out to a point, but simply continues to follow the eye shape and rounds down the side of the face.
The straight eyebrow shape starts out full close to the nose. Instead of thinning out down the side of the face, like the other two shapes, a straight eyebrow stays full and straighter across the face and then ends shorter and closer to the outer corner of the eye. This is the most natural-looking shape, and a good starting point for someone who has never thread, tweeze or wax their eyebrows.
Now that you have a general idea of the different eyebrow types, you can determine which natural shape you have. It is a good idea to match them to your face shape as well. This is the easiest way to figure out whether or not your eyebrow shape may need an update.
If you have a longer or oval face shape. Then you can balance your face by having straighter fuller, eyebrows. This helps to balance out the length of your face to make it seem more even.
For someone with a more rounded face, an arched eyebrow will help to lift the eyes and lengthen the distance from your chin to the forehead. Having a strong arch at the outer corner of your eyebrow will help to add some structure to your face and balance out the smooth facial lines.
Diamond and heart-shaped faces tend to already have harsh lines, with either a wider forehead or stronger jawline. The best way to balance out these more defined facial features is to have more rounded shaped eyebrows. This helps to soften the face. The more defined the jawline, the rounder and more shaped the eyebrows should be. If you have a wider forehead and more narrow chin, then opt for a more subtle rounded eyebrow.