

All you need to know about Henna Brows
This is a great all-natural way to temporarily tint your brow hairs and skin. Of course, I have had a lot of questions about this service, so I figured I would write out a post all about henna brows and answer the most frequently asked questions.
What is Henna Brows?
I have always loved body henna. During my senior year of high school, I had a friend henna my upper back, arm, and leg to match a dress I wore for a school dance. Probably my favorite look for a high school dance. When I heard of henna brows I knew I would eventually add this service to my books. It took me a while to find a brand I liked, but once I did, I was just so excited!
This is a great all-natural way to temporarily tint your brow hairs and skin. Of course, I have had a lot of questions about this service, so I figured I would write out a post all about henna brows and answer the most frequently asked questions.
I’m sure the first thing that comes to mind when I say henna is a traditional body henna method I mentioned above, known as Mehndi.
This type of henna has been used for generations. It stains the skin and turns to a warm red shade and slowly fades over time. This process occurs because the henna oxidizes, so as it fades the color changes and gets warmer in tone as it fades. Eyebrow henna is high-quality henna with other natural ingredients designed to not oxidize and will stay the same color on your skin and brows. Eyebrow henna ingredients work with the henna to make sure the color stays the same from start to finish.
So why henna and not traditional tint?
Well, there are a couple of reasons why I chose this method over other tints. Traditional tints use harsh chemicals that can dry out the brow hairs. Henna is all-natural and can actually help nourish the brows.
How long will it last?
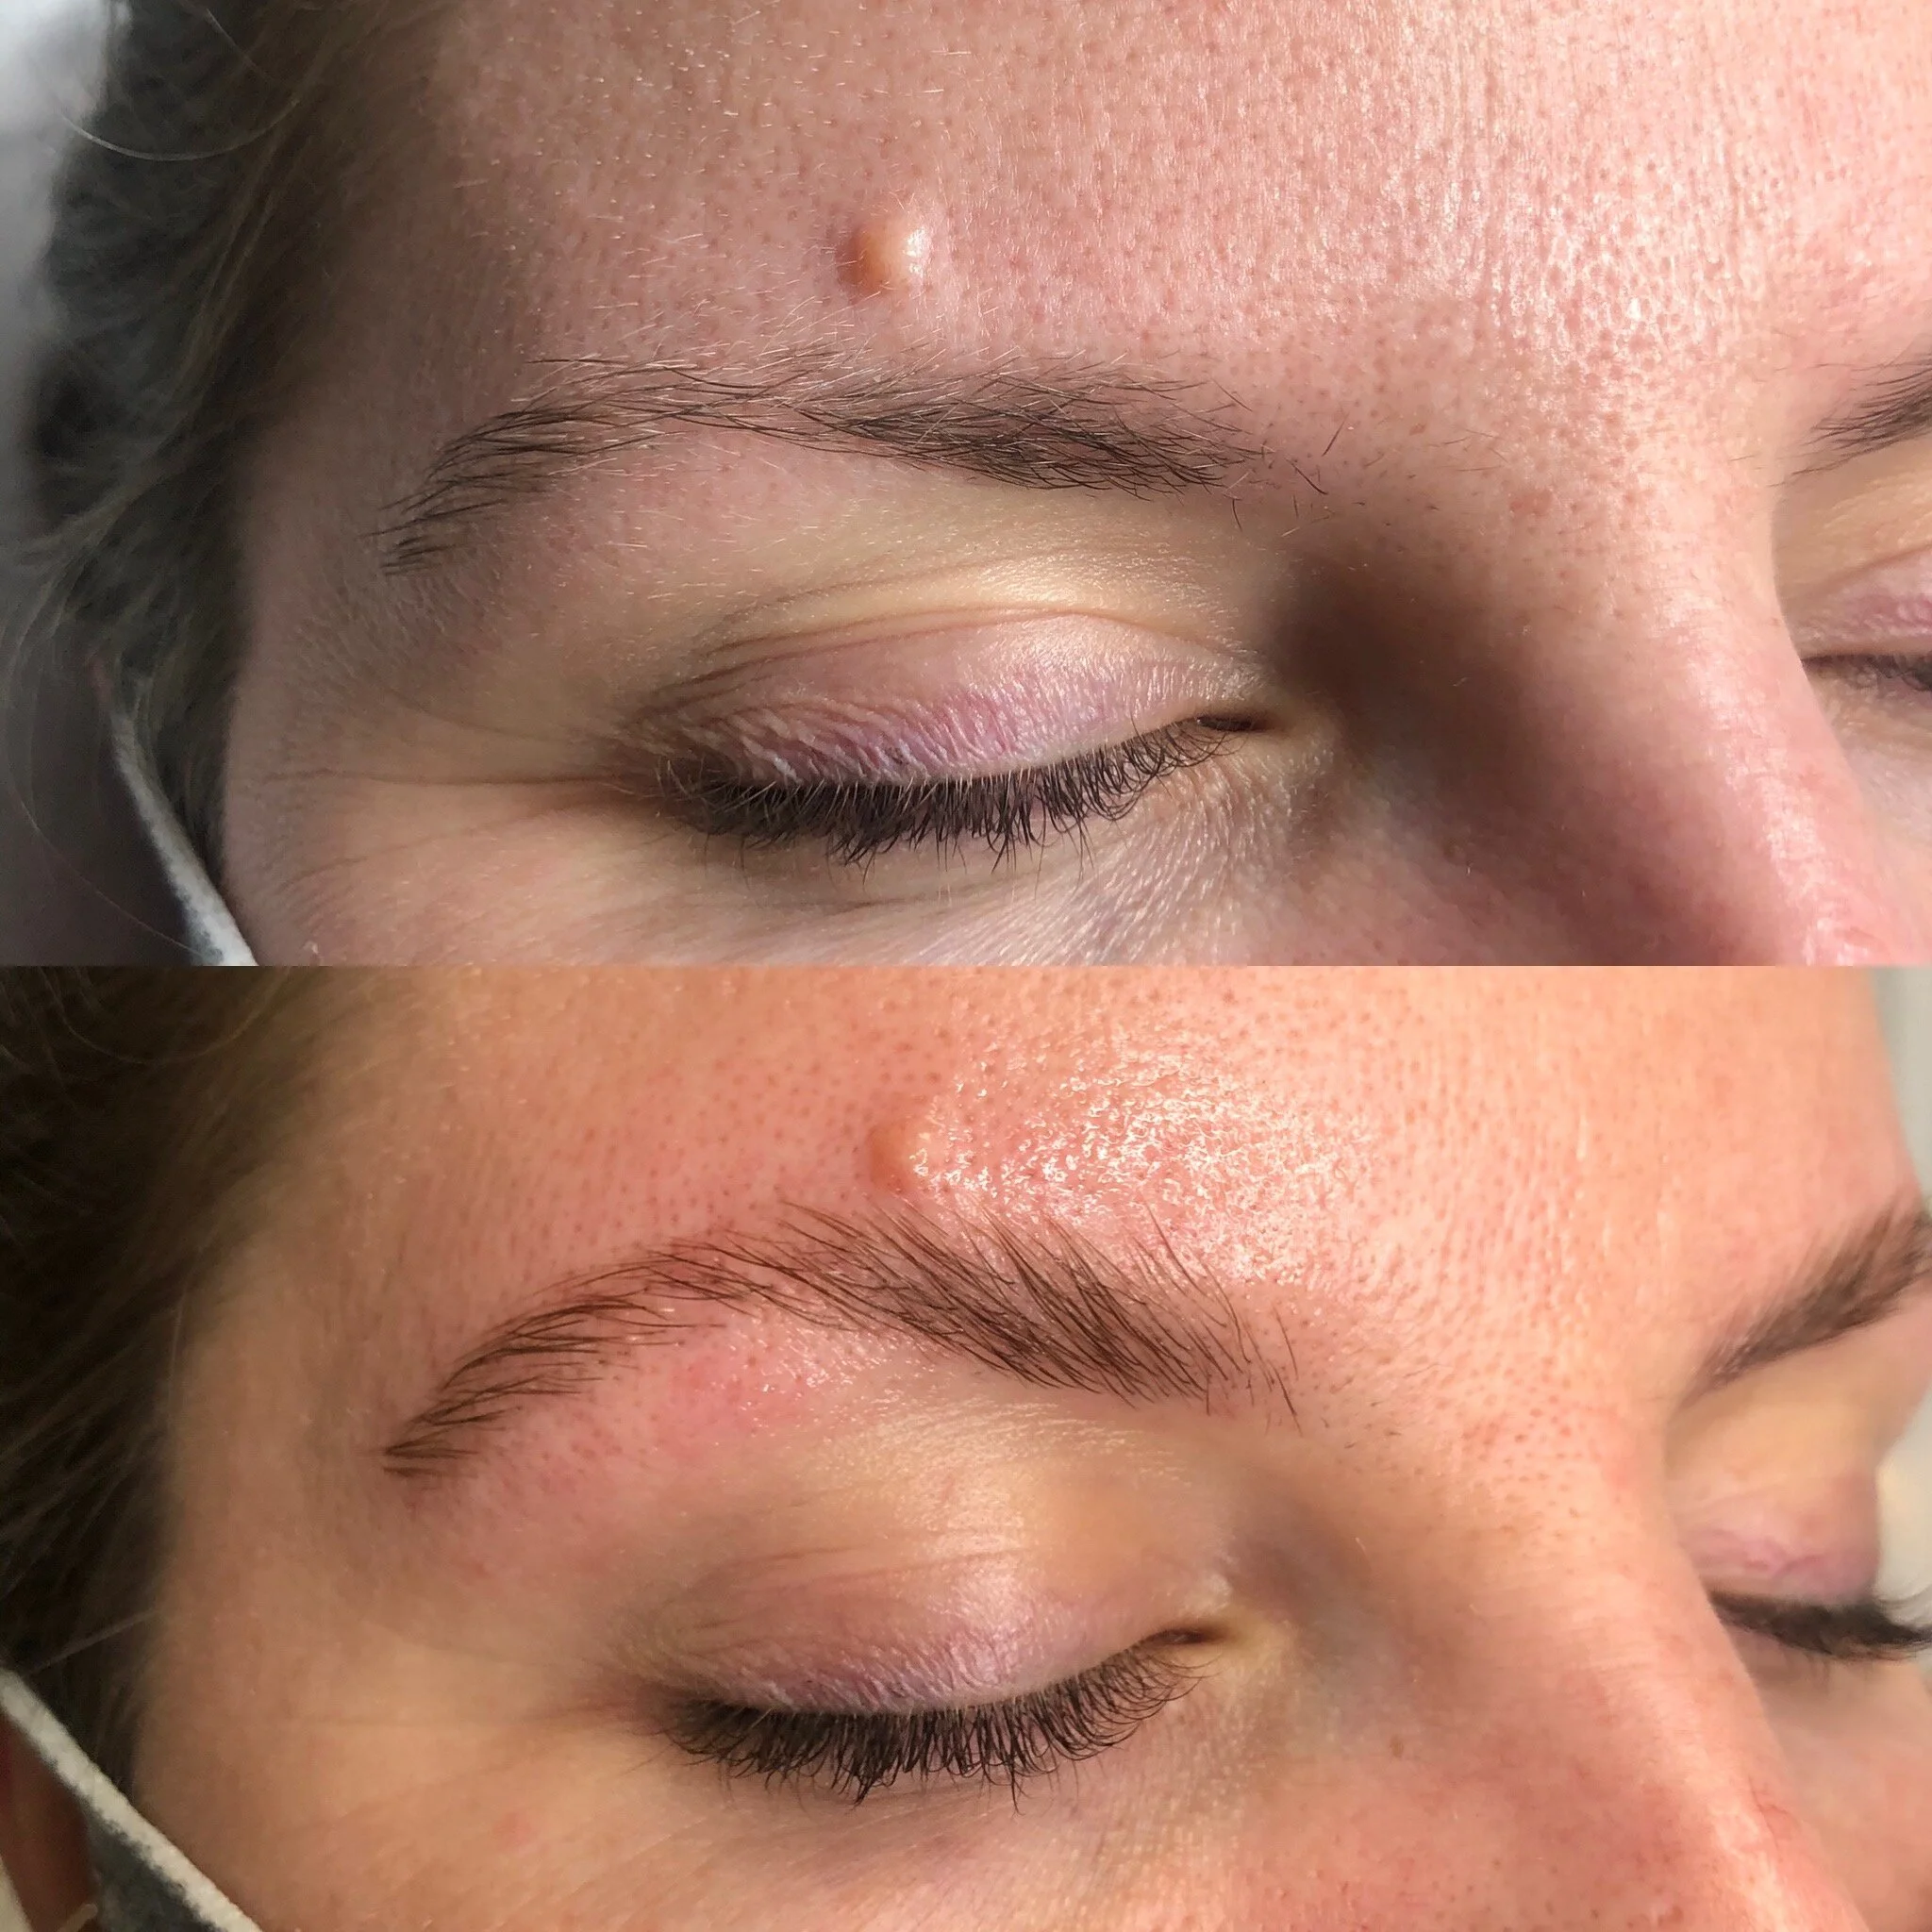
Henna can last 6-8 weeks on the brow hairs as long as you follow the proper protocol; Don’t wet your brow hairs for the first 24hrs and avoid hot showers or saunas. Henna also lasts 1-2 weeks on the skin as well as the brows, where tint only stains the hairs. How long it lasts on your skin mainly depends on your skin type. If you have oily skin, particularly on your forehead area, it only lasts about a week. If you have normal to dry skin, it lasts about two weeks on the skin.
While almost everyone can get henna brows, there are a few contraindications. If you have broken skin or skin disorders near the eyebrow, G6PD deficiency, or Seborrheic dermatitis, or if you are allergic to henna, this service is probably not right for you.
If you are not sure if you will have a reaction or if it’s safe for you, we can always do a patch test 5-7 days before the service to make sure it’s right for you.
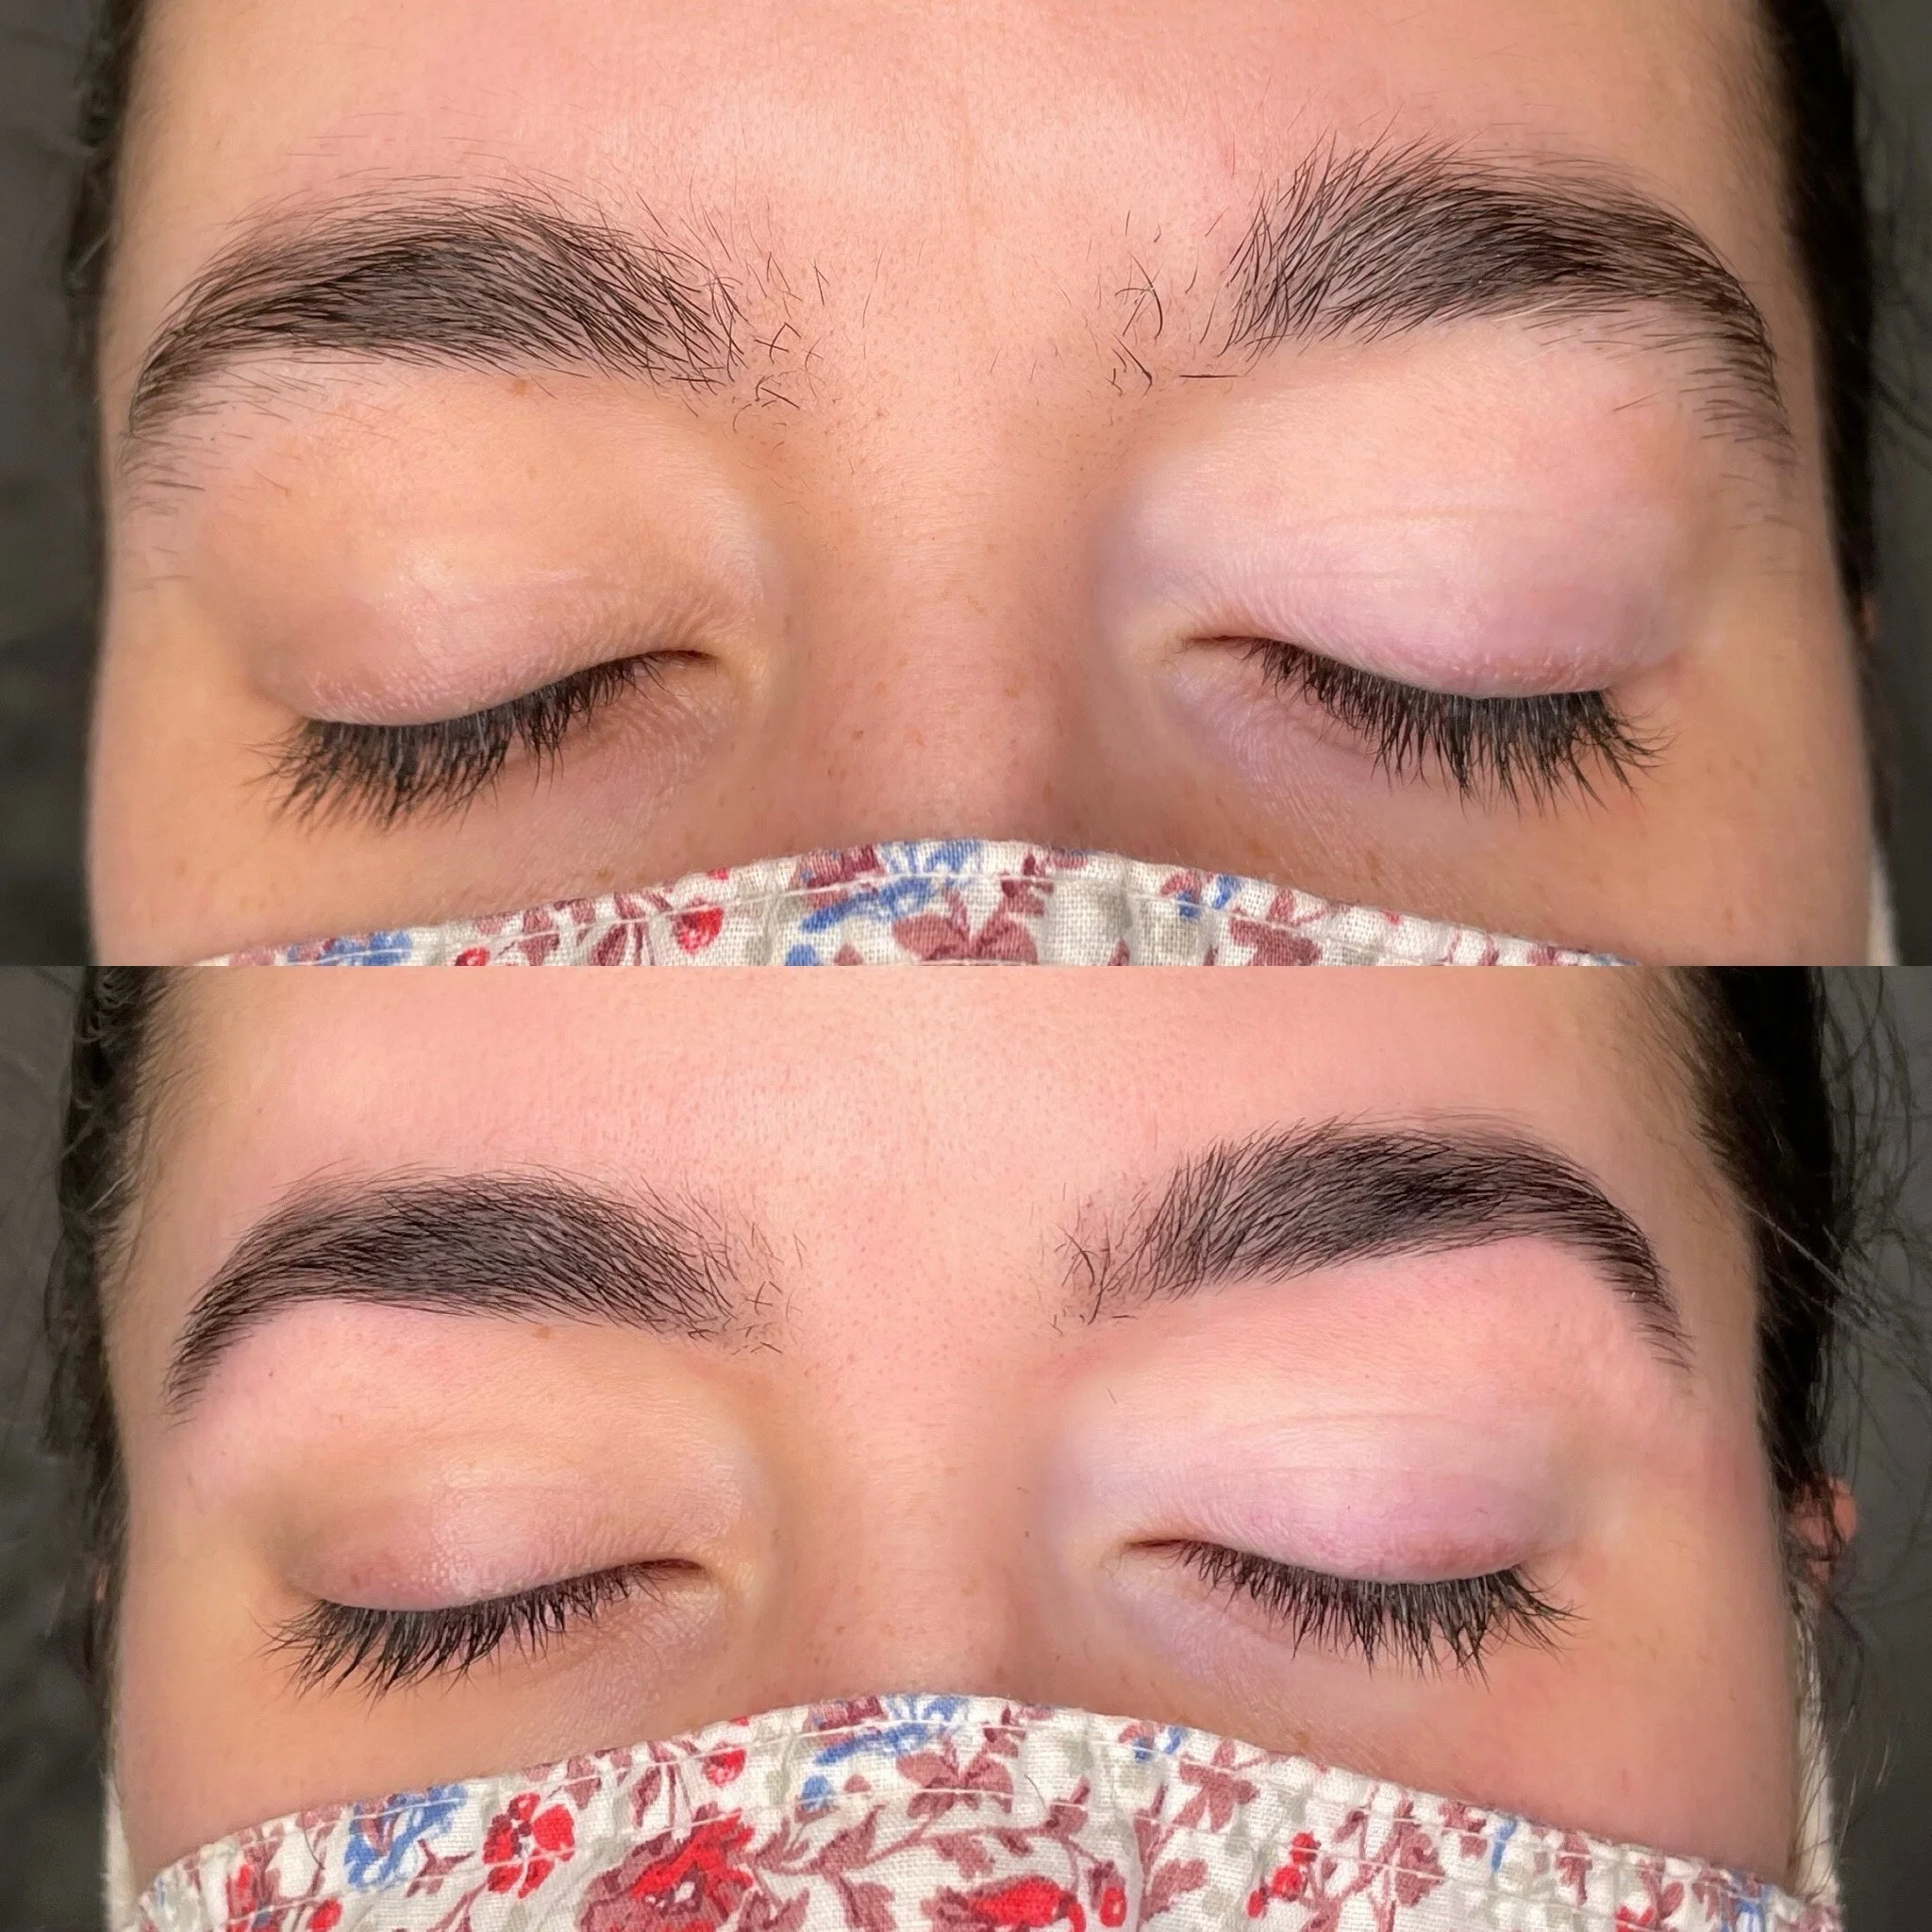
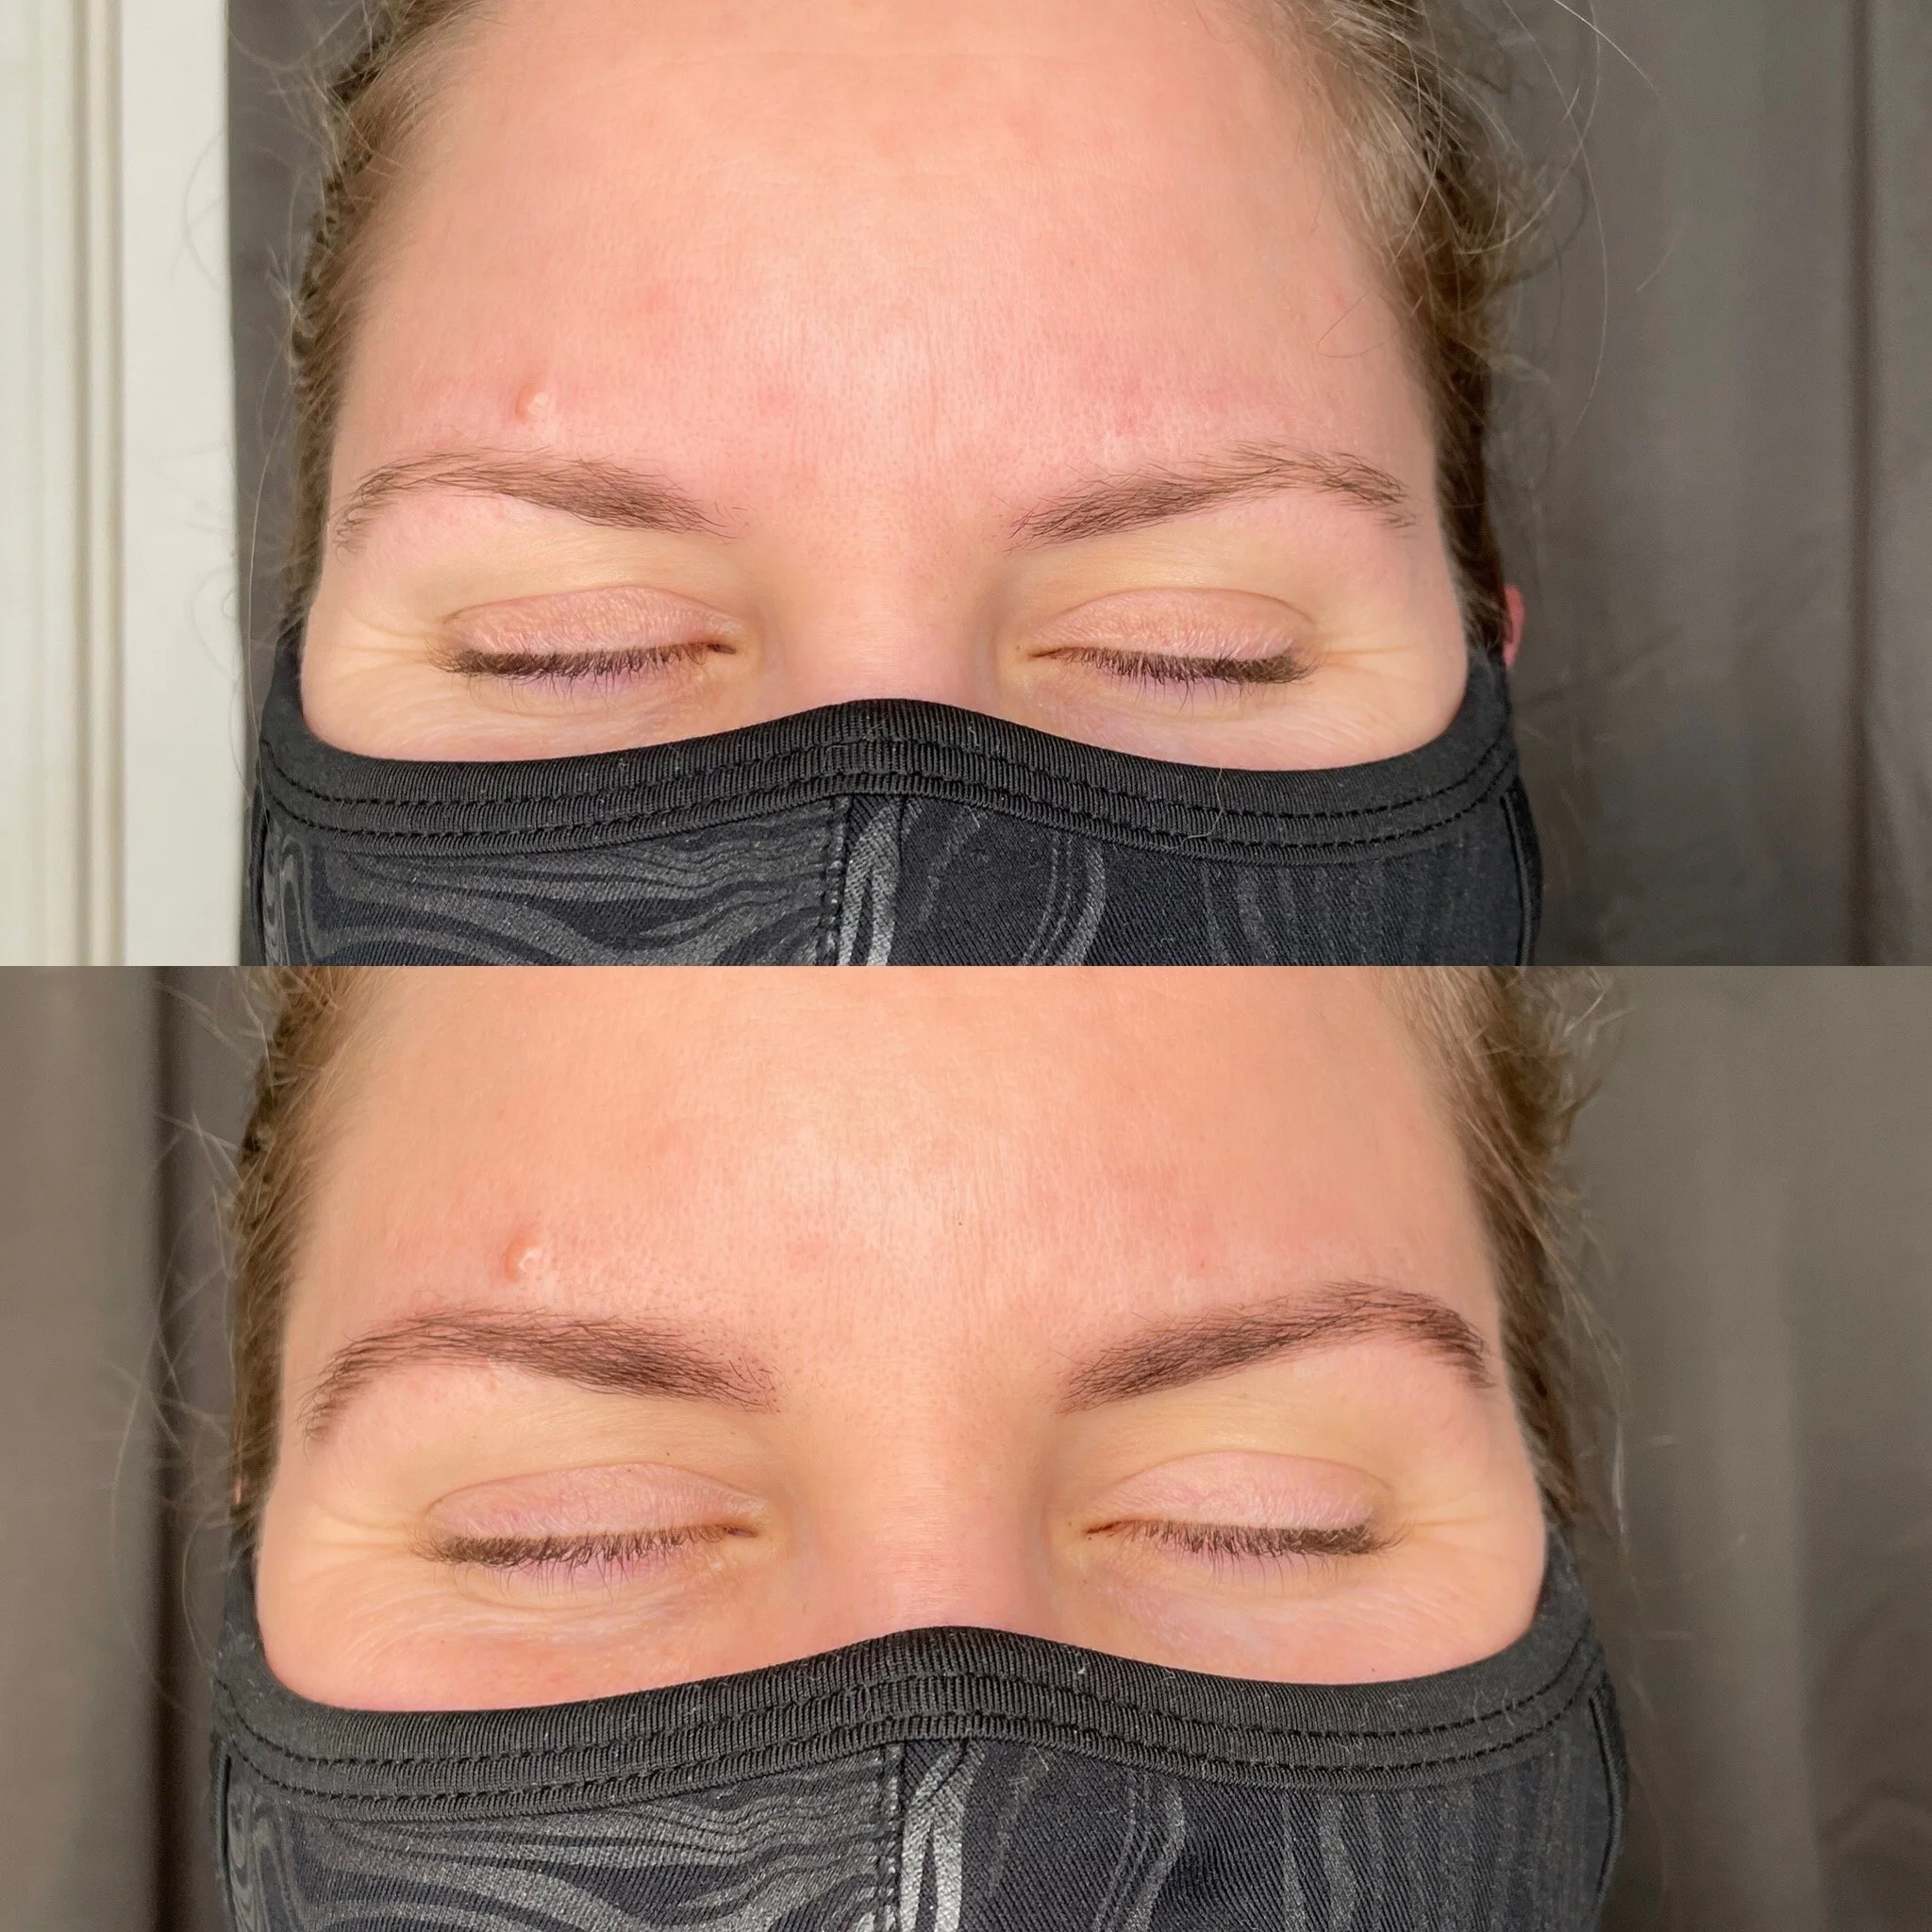
If you are filling in your brows constantly every day and are looking to save some time in the mornings this is a great service. If you have gaps in your brows or areas that you are looking to grow in, henna brows can be a great solution to give you the full look you desire.
Can you do henna over microblading or tattooed eyebrows? If you have old microblading done, you can also henna over the microblading as long as it’s not fresh microblading. I do not recommend this service if you have had microblading within a year.
All my henna appointments include threading or waxing shaping to give you perfect eyebrows.
Want to complete the lazy girl who has no time in the morning for a makeup look? Then pair henna brows with an eyelash extension service. Who has time in the mornings for makeup anyways? Well, this way your lashes and brows will look perfect every morning.
Are you ready to book your service?
Just click the link here to get started!

Want Supermodel Eyebrows?


I have always been obsessed with good eyebrows. Some personal favorites are Cara Delavine, Addison Rae, and, Taylor Hill. They all have great bold, fluffy brows that stand out in such a lovely way.
So what’s the secret to their bold eyebrow looks?
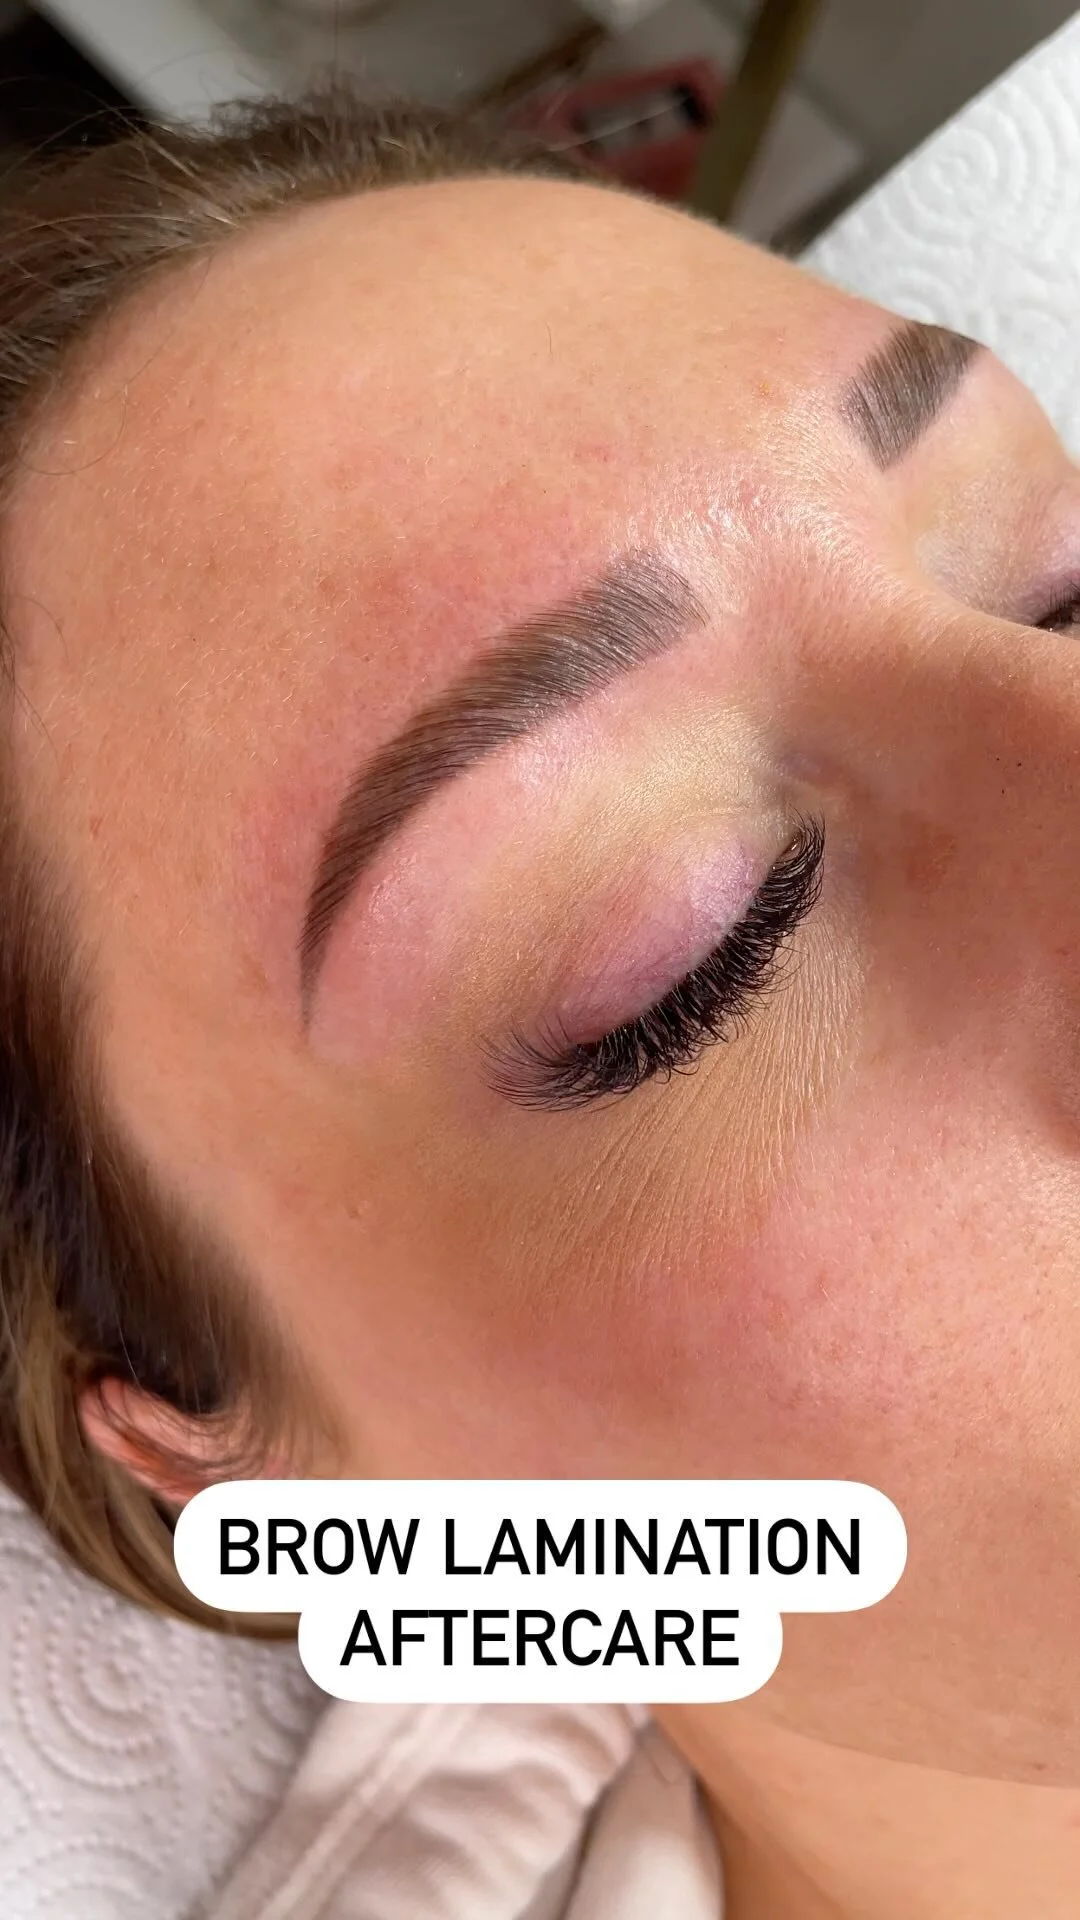
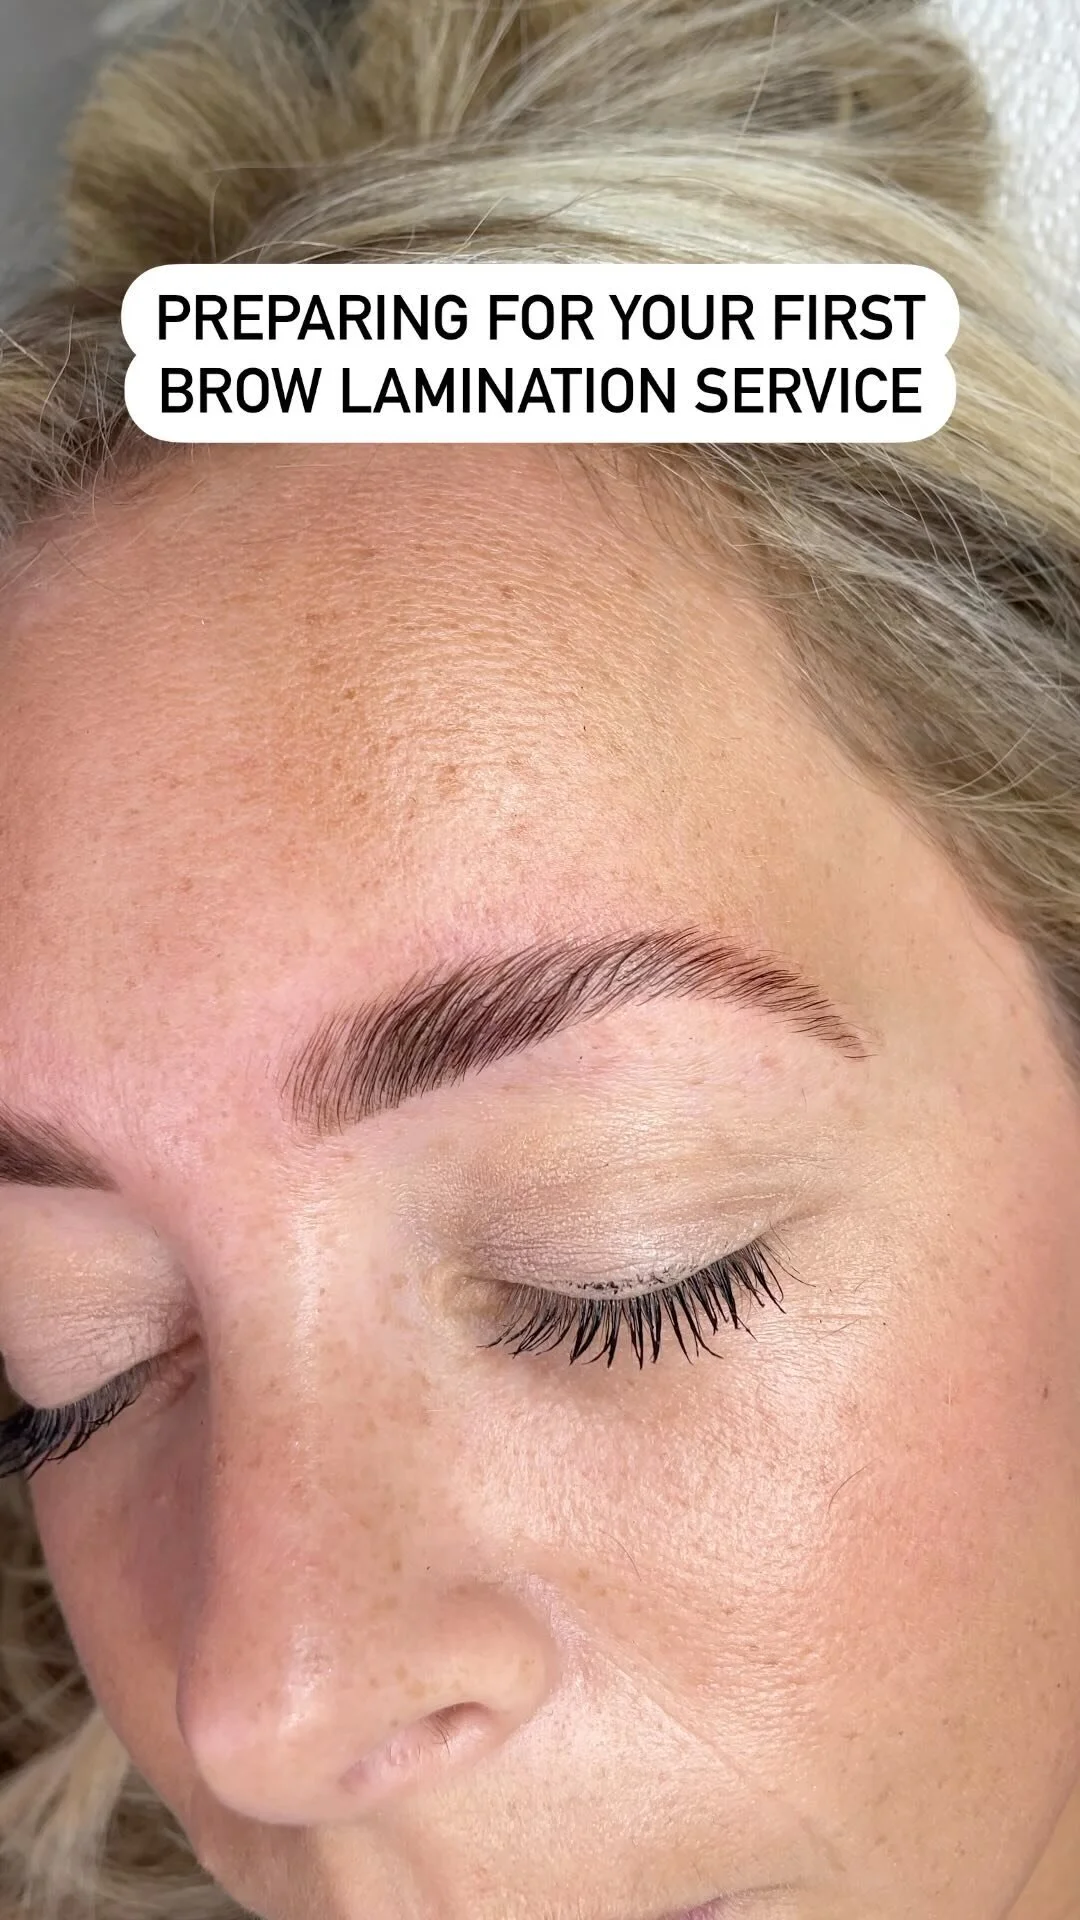
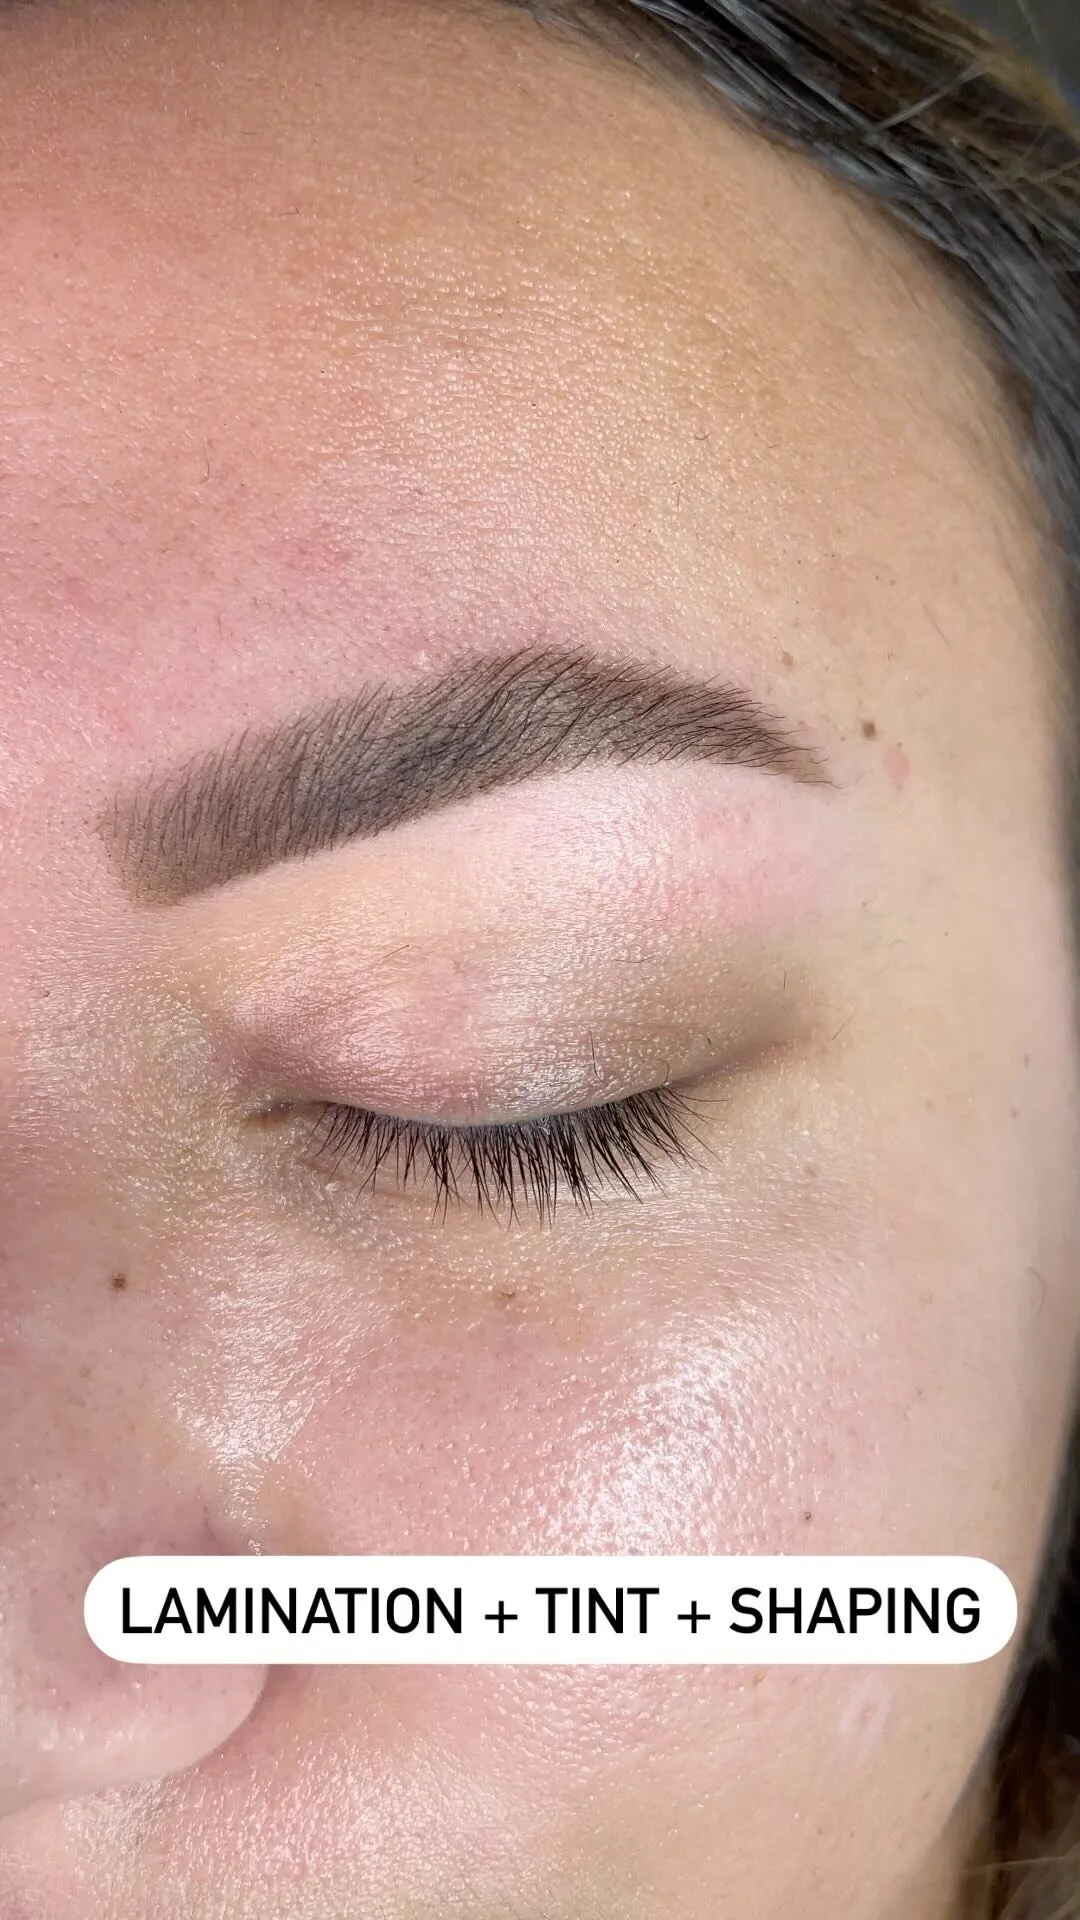
Eyebrow Lamination. This is the newest service that gives you fuller, fluffier eyebrows that are worthy of the supermodel status.
So what is eyebrow lamination? And how does it work?
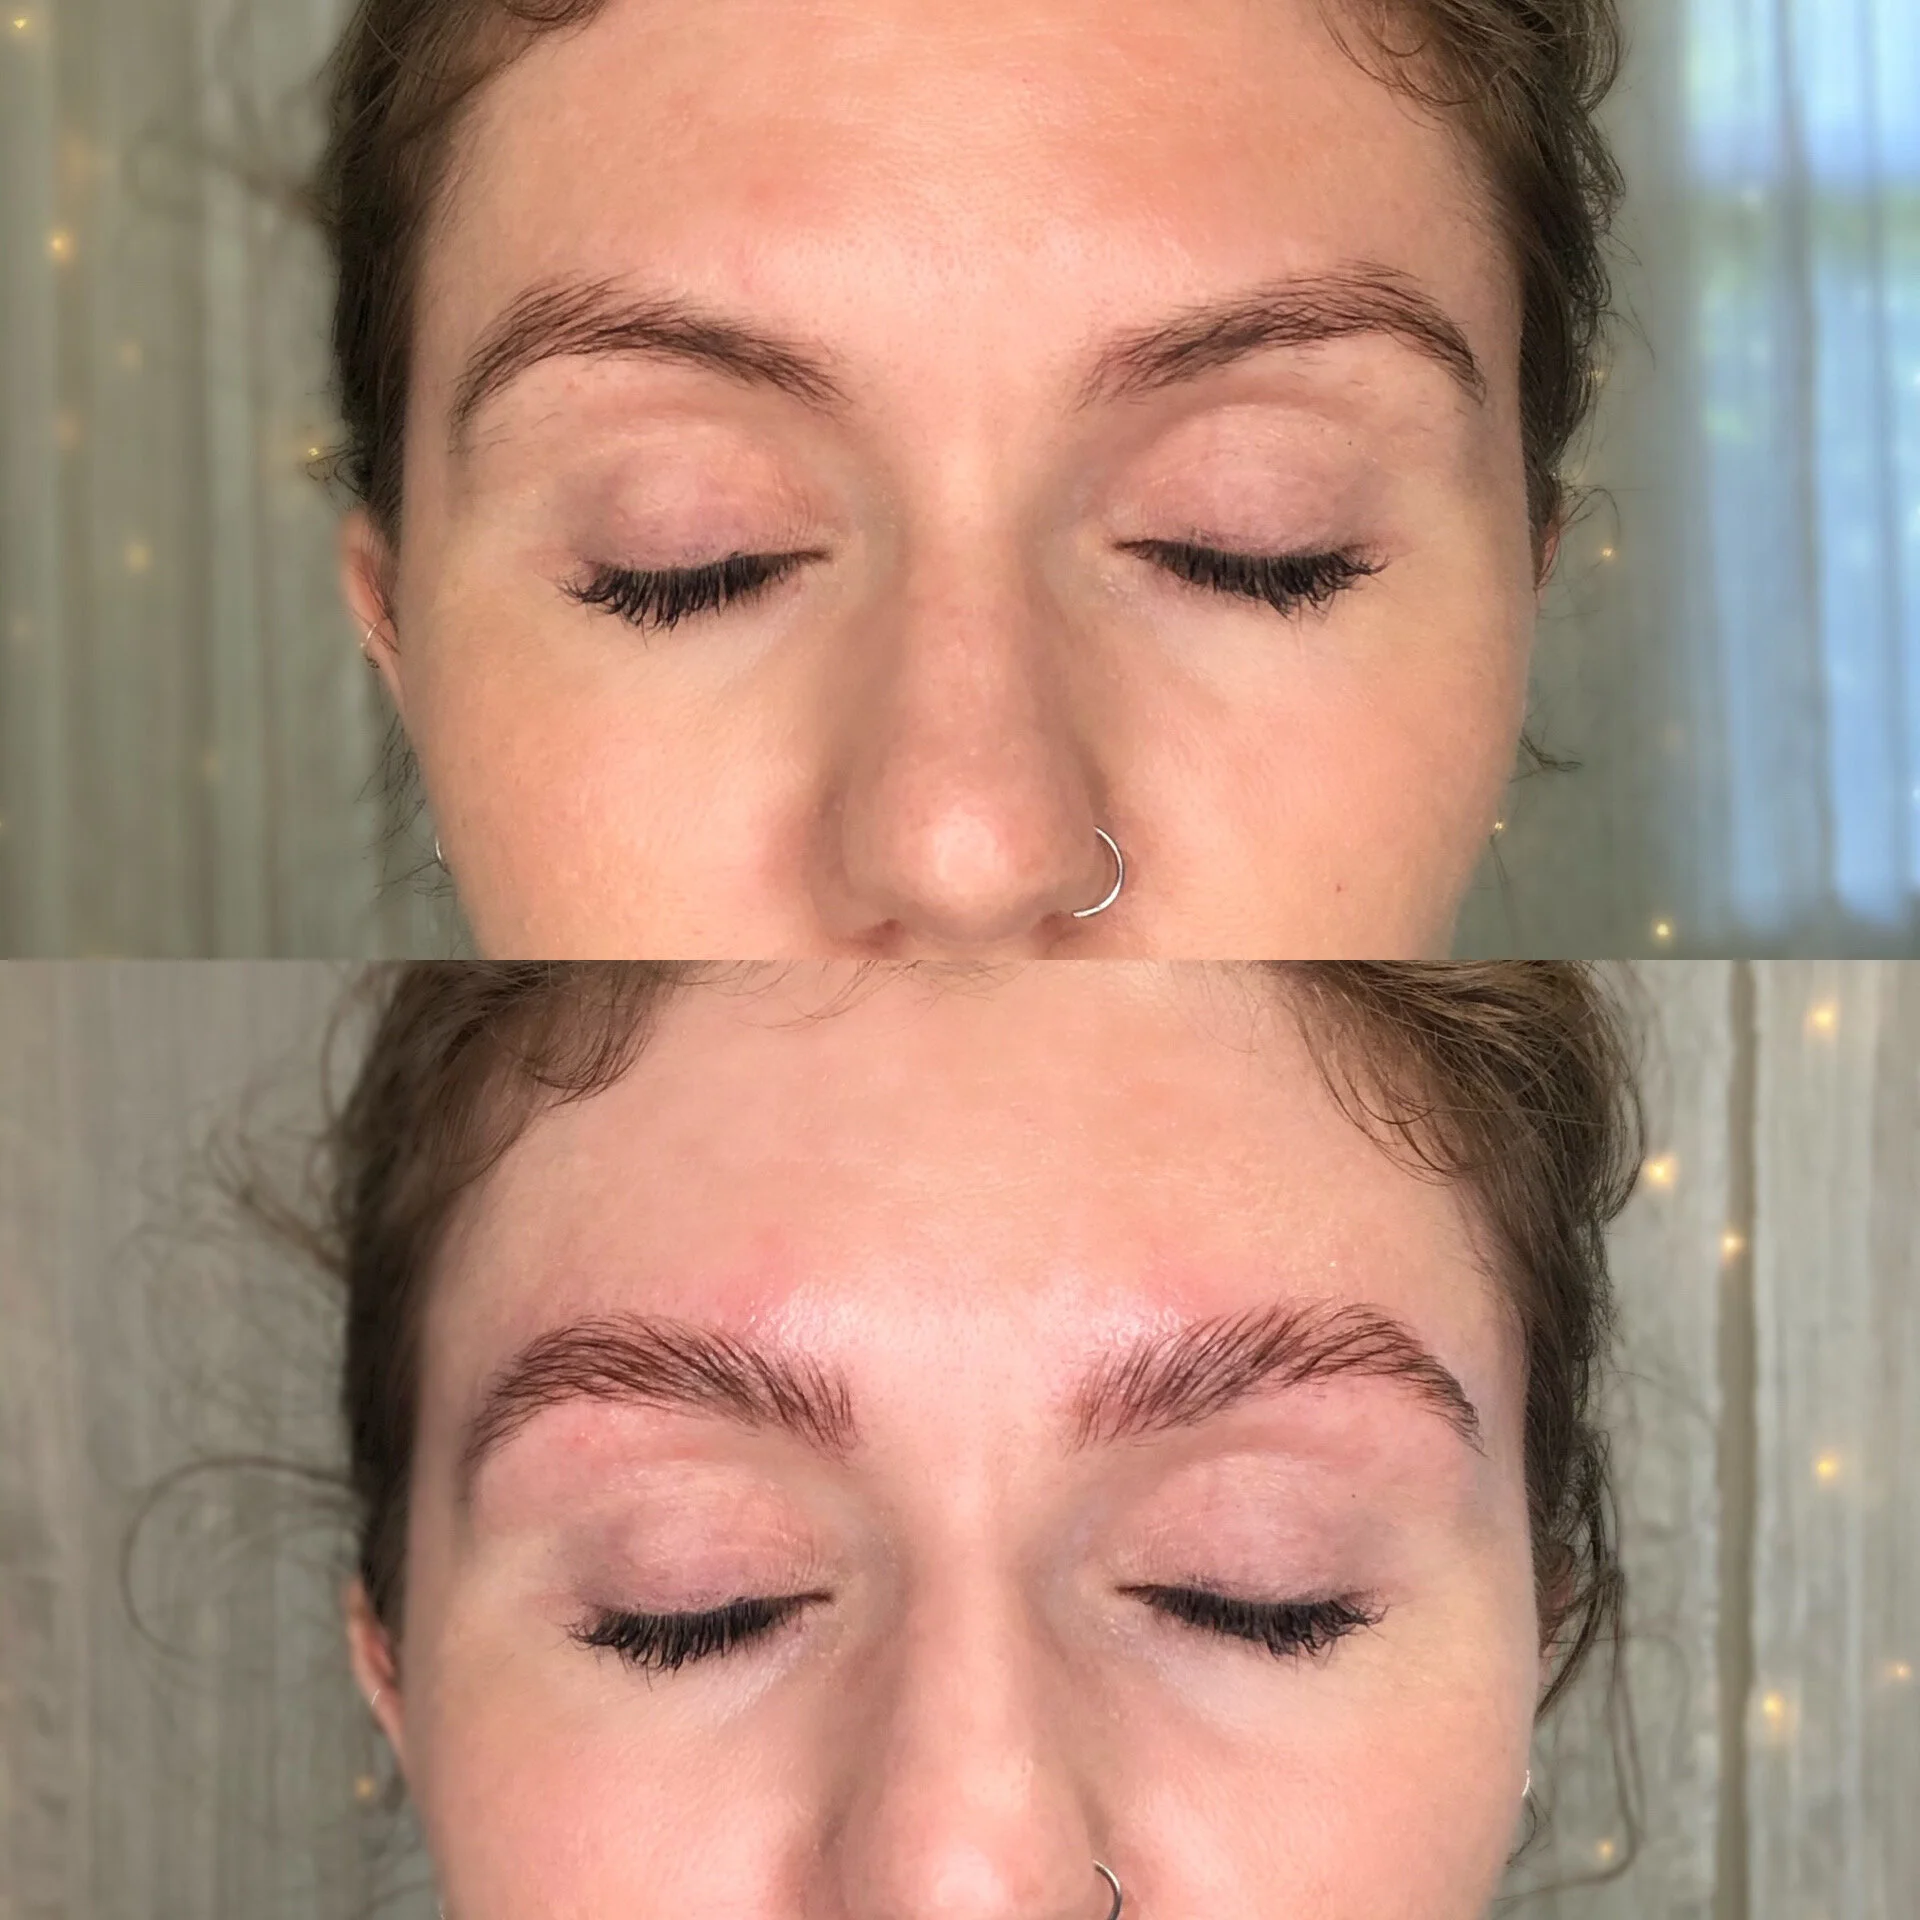
Eyebrow lamination is a three-step process that softens your brow hair’s natural structure then reforms the way they grow to give you more natural and fuller looking eyebrows.
It takes about 45 minutes to complete. The first step is designed to break down your eyebrow hair’s current bonds and open up the cuticle.
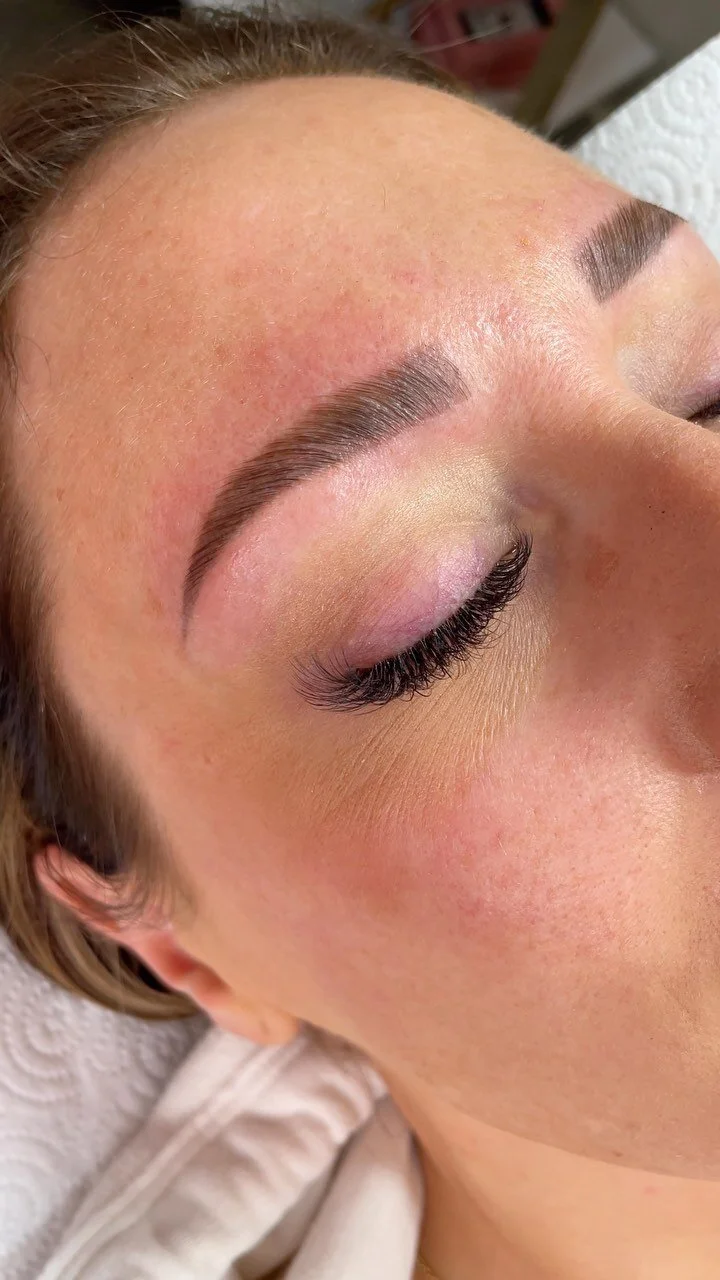
Once this is processed we apply the setting lotion. This lotion helps reform your brow shape to make them go the direction you want and stay there. Think of it as a long-lasting eyebrow gel.
For people whose eyebrow hairs grow straight out, or down, this service helps reposition those hairs to grow up and blend to the shape of your eye. Giving you a fuller more defined look.
I also include an eyebrow threading within your appointment for flawless brows in one sitting.
After threading a nourishing oil is applied to help bring moisture back into your hairs so they stay healthy and continue to grow.
You are gifted with a brow balm specifically designed to help keep your eyebrows hydrated throughout the day.
A few things to keep in mind. This is not a permanent service, it lasts for about 6-8 weeks and then you will need to get touch-ups.
Your eyebrow hairs are not permanently stuck in one position. Your hairs do still move like normal, this allows you to customize their shape.
Most of the time I like to just brush mine out at an angle. But sometimes if I want a more dramatic look they can be brushed straight up for a fluffier look.
You can still use eyebrow products to fill them in if you like your eyebrows darker.
My pro tips for getting the best lamination service:
grow your eyebrows out and don’t touch them for 3-4 weeks. This gives them plenty of time to get nice and full. The results will be worth it trust me.
Schedule a threading appointment with me first. This way I can determine if you are a suitable candidate for eyebrow lamination.
I love filling my brows in with a pencil and then applying the nourishing balm. This gives them a bold and beautiful look (i.e. my supermodel dream brows!)
Want to learn more about this service? Lets book your introductory threading appointment here
Connect with me on social media @beautybyanniemink
Thanks for listening lovelies,
Annie


Eyebrow Shaping 101 pt. 2

Alright, now comes the fun part, learning how to fill in your eyebrows! Filling in your eyebrows helps to brighten up your face and create a more defined shape. First thing I tell all my clients, especially those who have their eyebrows shaped for the very first time: Like any new technique or skill, it takes time and practice to master.
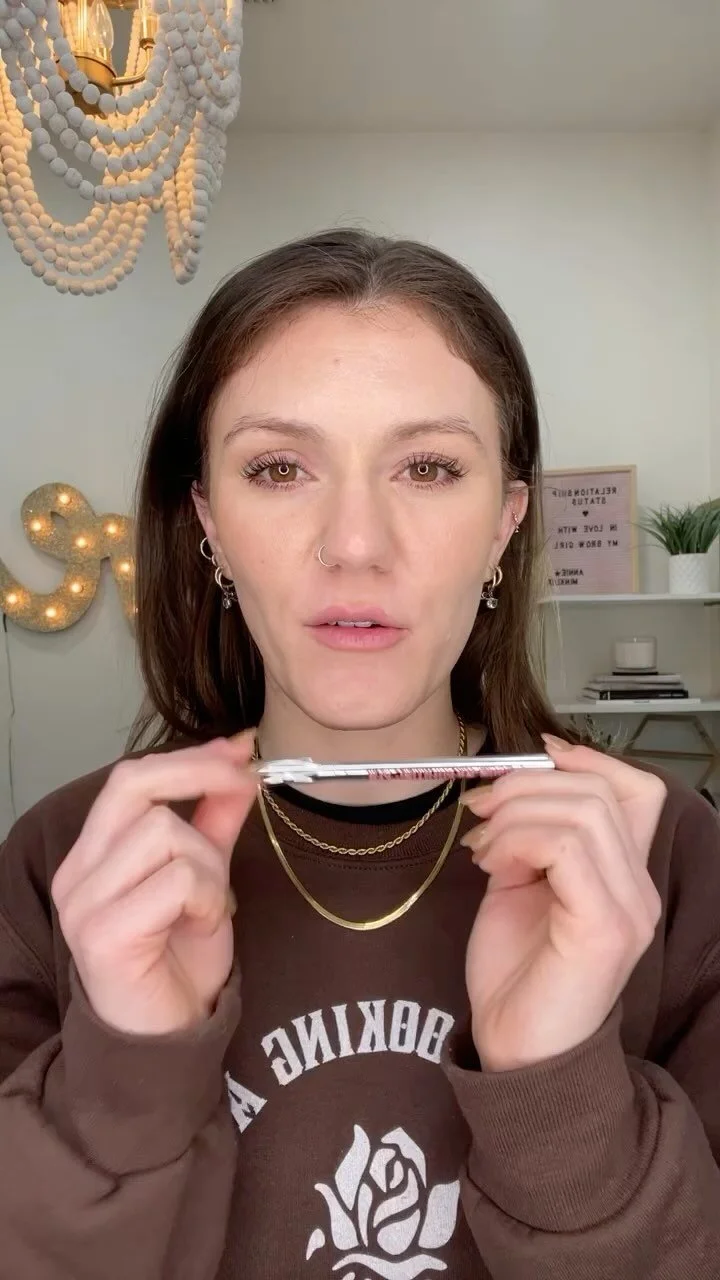
I like to use an eyebrow pencil when filling in clients’ eyebrows. There are many different products available. I also use powders, brow gel, and creams but I have found pencils are the most forgiving product and easily blended into the eyebrow hairs. It is also the best for reshaping or correcting your eyebrows. You want to make sure you are first using a color that matches your eyebrow hairs.
For brunettes, choose a pencil that is one to two shades lighter than your hair color. Eyebrow pencils tend to be a bit cooler in color and once applied to the skin they warm up and blend in. Choosing a darker color can potentially make your eyebrows a little too dark (unless that’s the look you’re going for). In contrast, blonde-haired ladies, you want to choose a color one to two shades darker. Blondes tend to have really light eyebrows, so in order for them to be seen, the pencil needs to be slightly darker. I mainly use a taupe or dark brown color and find that those shades work for almost everyone’s eyebrows.
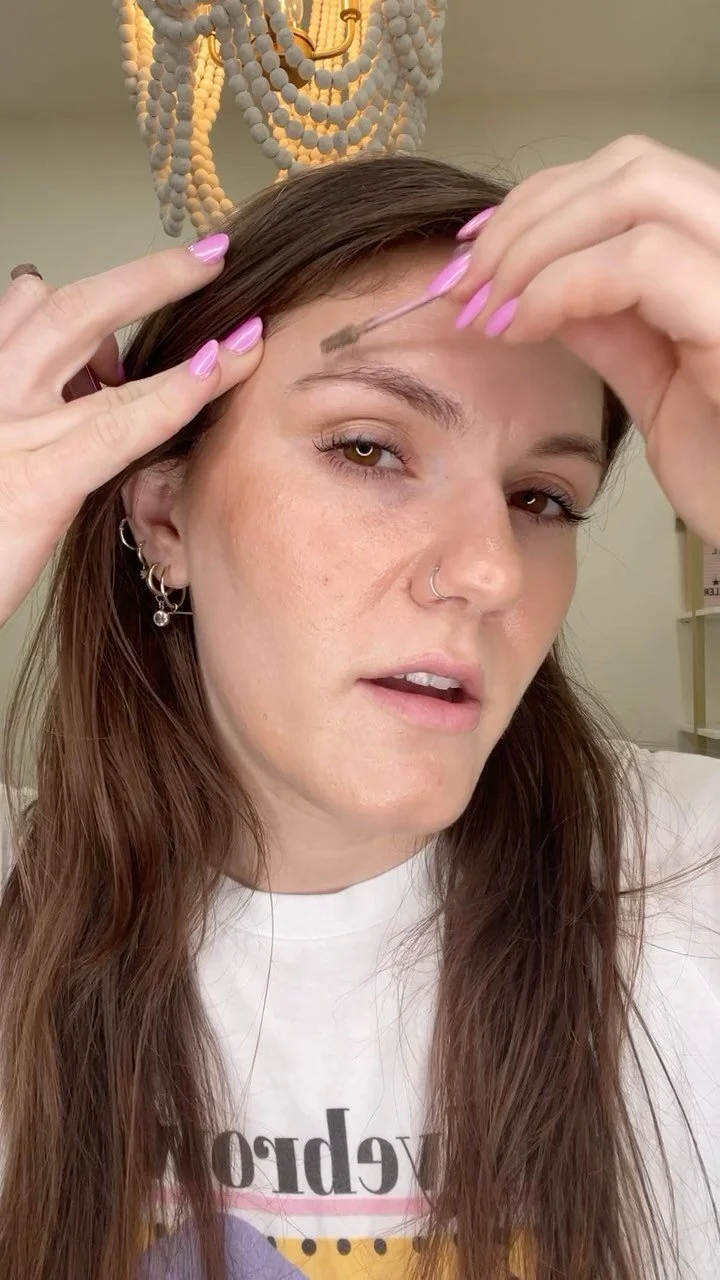
Once you have picked the right pencil, you’re ready to start filling those babies in! Start with the pencil in the bottom inner corner of your eyebrow, closest to the nose. Follow the bottom line of your eyebrow with your pencil in a straight line out to your arch. Then go back through with a clean mascara wand and blend up and through your eyebrow hairs. Make another line starting at the top inner corner of your eyebrow and across to your upper arch. Once again, be sure to go back and blend your line through the hairs, this helps to provide definition to your eyebrow shape, while also keeping the natural look. Now, starting at the top arch of your eyebrow, using your pencil follow the line of eyebrow hairs down the side of your face and blend.
To give the appearance of fuller eyebrows, start your line from the top of the arch out a little further than your eyebrow hairs. This creates an “arch” in your eyebrows, then drop the line down the side of your face a tad higher than your eyebrow line. Then, make a line from your lower arch line out to connect the top line at a point on the side of your face. From here, brush and fill in any of the gaps you may see. For someone who has straight eyebrows that don’t drop down the side of the face, the easiest way to make them appear fuller, and longer is to simply extend your pencil line out about 1-2 centimeters. Start by drawing a line at the top arch, where your brows end, and extend your line down. Then draw another line from the bottom point of your brow down to meet the other line. This should create a thin triangle-like line. Lightly fill in any gaps that may fill be seen and light blend out the lines with a mascara wand to make them more natural.
Now that you have the basics of eyebrow shaping down, your next step would be to grow and leave your eyebrows untouched for 2 weeks! Even if you’re a tweezer, this means no tweezing or touching up! Then you will want to schedule an appointment to get your eyebrows done. Remember, you can always let your eyebrow expert know the desired shape you are going for. It might take a few appointments to get there, but that is the beauty of filling in your eyebrows.
Start experimenting with shaping and filling in your eyebrows. You will be pleasantly surprised by how much it can enhance your face and brighten your eyes!

Eyebrow Shaping 101

How To Find Your Perfect Eyebrow Shape
Part 1
I am so excited to talk about all things eyebrows! I specialize in eyebrow threading and I have been doing it for almost 4 years now. Naturally, I realized I have a lot to say on this topic so I decided to break it down in two parts. Part 1 is designed to help you discover your natural eyebrow shape and face shape. Part 2 will then be focused on learning the different techniques of filling in your eyebrows. I love showing my clients how to properly fill in their eyebrows. My hope is that you learn a few helpful tips to confidently fill in your eyebrows like a pro.
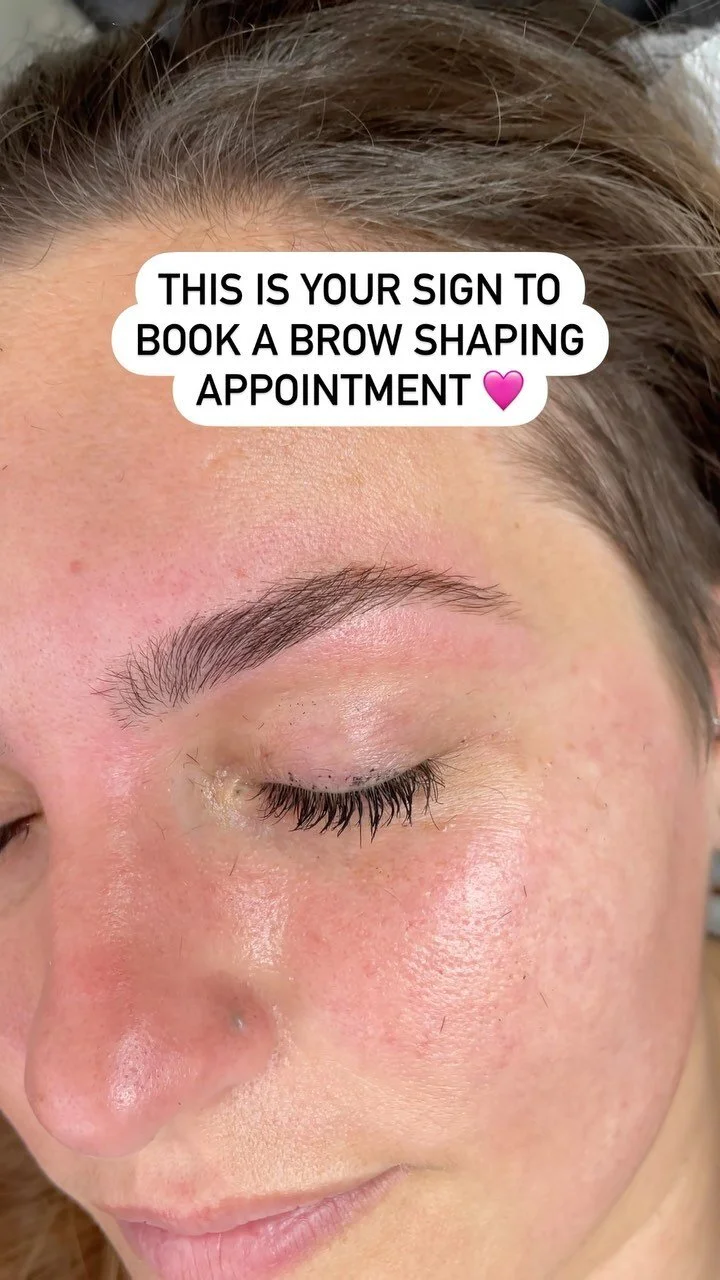
I love being able to bring a person’s face to life by simply shaping their eyebrows to give a more defined look. A simple thing like adding a small arch to the eyebrow, or cleaning up all the hairs not directly in the shape of the eyebrow, can make a huge difference. I highly recommend for everyone to see a professional when it comes to waxing or threading your eyebrows. It’s also very important that you know how to properly communicate the desired eyebrow shape you are wanting to your specialist.
So how do you figure out what eyebrow shape works best for you? Well, first you want to know the natural shape of your eyebrows. There are three main shapes that eyebrows have: arched, rounded, and straight. The best way to determine which shape you have is to look directly into a mirror at your eyebrows, starting on the inner corners closest to your nose. Bathroom mirrors are usually the best because they have the best lighting!
If your eyebrows follow the shape of your eye straight out towards the side of your face and angle up to a point then drops down at a 45-degree angle, then you have more of an arched shape. This shape is popular for its more defined and clean lines.
The round-shaped eyebrow is similar, it follows the shape of the eye out and tapers down the side of the face. The main difference is a rounded eyebrow does not arch out to a point, but simply continues to follow the eye shape and rounds down the side of the face.
The straight eyebrow shape starts out full close to the nose. Instead of thinning out down the side of the face, like the other two shapes, a straight eyebrow stays full and straighter across the face and then ends shorter and closer to the outer corner of the eye. This is the most natural-looking shape, and a good starting point for someone who has never thread, tweeze or wax their eyebrows.
Now that you have a general idea of the different eyebrow types, you can determine which natural shape you have. It is a good idea to match them to your face shape as well. This is the easiest way to figure out whether or not your eyebrow shape may need an update.
If you have a longer or oval face shape. Then you can balance your face by having straighter fuller, eyebrows. This helps to balance out the length of your face to make it seem more even.
For someone with a more rounded face, an arched eyebrow will help to lift the eyes and lengthen the distance from your chin to the forehead. Having a strong arch at the outer corner of your eyebrow will help to add some structure to your face and balance out the smooth facial lines.
Diamond and heart-shaped faces tend to already have harsh lines, with either a wider forehead or stronger jawline. The best way to balance out these more defined facial features is to have more rounded shaped eyebrows. This helps to soften the face. The more defined the jawline, the rounder and more shaped the eyebrows should be. If you have a wider forehead and more narrow chin, then opt for a more subtle rounded eyebrow.